

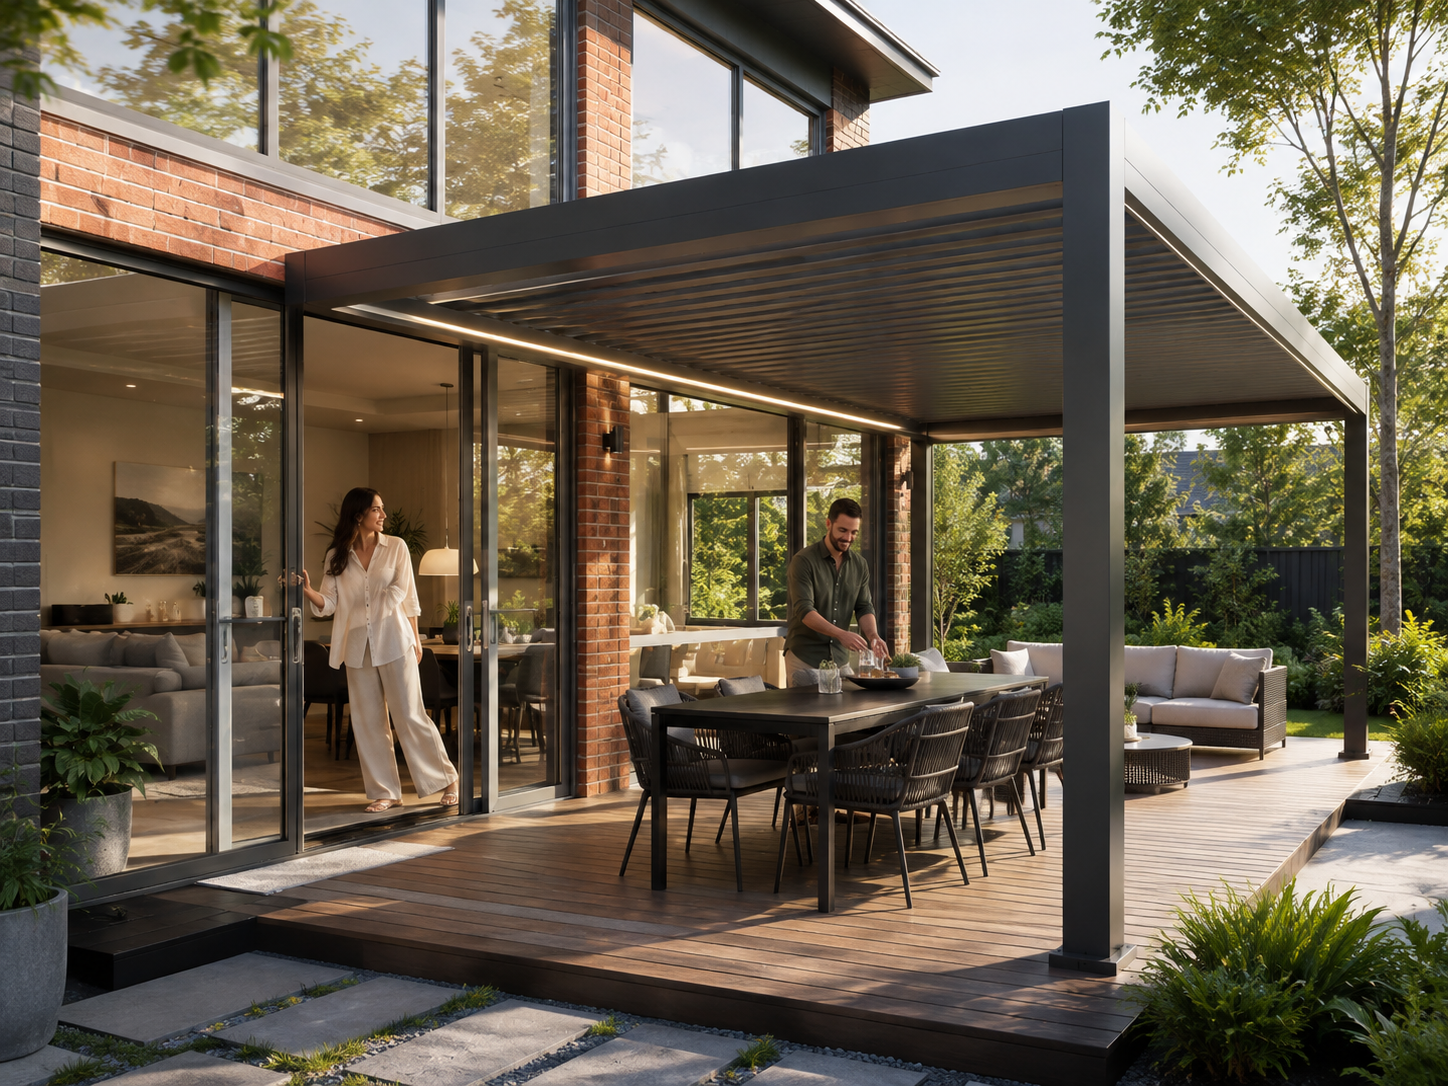
A patio cover beside sliding doors or large windows should be planned around the opening before it is planned around the paving. The active door panel, door head, screens, adjoining windows, eaves, gutter and everyday walking route all influence where the roof and posts can comfortably sit. A structure may fit the patio dimensions on paper and still make the threshold feel tight, interrupt a garden view or remove more indoor light than expected.
The most useful checks happen while the space is being used normally. Open the screens, slide the main door fully back, pull dining chairs out, carry something through the doorway and look through the glass at different times of day. These simple tests reveal conflicts that a roof-width measurement alone cannot show.
Plan in this order: protect the active doorway first, preserve useful indoor light and views second, then keep posts outside the route people actually walk. Only after those relationships work should the final roof footprint become the priority.
Start With the Sliding-Door Panel People Actually Use
A long glass wall can look symmetrical even when the household uses only one section as the everyday exit. A three- or four-panel sliding-door system may have one active opening leading directly toward the dining table, barbecue, lawn or side path. That opening should control the first layout decision.
Do not automatically centre the structure on the complete glass assembly. First mark the active panel, the point where someone steps onto the patio and the direction they naturally turn. A perfectly centred roof can still place a post directly beside the only door that is regularly used.
Measure the openings while they are fully open
Record the overall width and height of the door or window frame, but also measure the clear width of the active opening. Slide screens into their normal position and open hinged doors, awning windows or casement windows completely before deciding where a post, beam or roof edge might sit.
Handles, flyscreen housings, external blinds and projecting window sashes can extend beyond the closed frame. Photographing the façade only with everything shut may hide exactly the area that needs to remain free.
- Overall width and height of the door or window assembly.
- Clear width of the panel used for everyday access.
- Full swing or projection of screens, doors and operable windows.
- Door-head height and distance to the eaves and gutter.
- External blinds, wall lights, handles or other nearby fixtures.
- The position where a person naturally lands after stepping outside.
Check the Threshold Before Deciding How the Roof Should Meet the House
The relationship between the indoor floor, sliding-door track and outdoor surface affects how the structure feels from inside. A raised track, exterior step or falling patio can make the same beam position feel noticeably different from one installed beside a flush threshold.
Photograph the doorway from the side so the level change is visible. Record steps, raised tracks and the direction of paving fall near the opening. These details matter because the threshold is both a visual transition and the point crossed most often.
Also include the eaves, gutter, downpipe and nearby drainage points in the same photograph. The preferred roof position needs to work with the existing house edge rather than treating the wall and patio as separate parts of the project.
If headroom is the main constraint, the pergola height planning guide covers roof height and clearance in more detail.
Test the Beam Line From Inside the Room
Large windows make the indoor effect of a patio cover more noticeable. From outside, the roof may appear comfortably high. From a kitchen bench, dining chair or sofa, the same front beam may become a strong horizontal line across the garden view.
Painter's tape gives you a simple way to test that relationship before ordering. Place a horizontal strip across the glass at approximately the proposed beam height, then return to the positions where people normally sit or stand. The tape cannot reproduce the complete structure, but it quickly shows whether the beam is likely to dominate the view or make the opening feel visually low.
Check from the sofa, kitchen bench or dining position rather than directly beside the glass.
Use painter's tape to approximate where the strongest horizontal element may sit.
Consider how far the roof projects beyond the glass rather than judging height alone.
Check how much sky and garden connection remain visible from inside.
Repeat the test at the times that matter
Look at the room early in the morning, during its strongest sun period and again in the late afternoon. A breakfast area may depend on soft morning light, while a west-facing living room may benefit from much stronger shading later in the day.
Testing only at midday can therefore give a misleading impression. Judge the adjoining room at the time it is actually used.
Roof depth matters alongside beam height. A shallower projection may protect the immediate doorway while leaving more sky visible. A deeper roof can cover a complete dining setting, but beside large windows it can also change the indoor daylight more noticeably.
The useful test is from both sides of the glass. Outside, check weather protection and usable patio space. Inside, check the beam line, visible sky, view and the light that the adjoining room relies on.
Let the Door Wall Decide the House-Side Layout
The choice between a wall-mounted and freestanding arrangement becomes more specific beside large openings. Instead of asking which style generally looks better, ask which arrangement leaves the glazing, active door and surrounding house details workable.
A wall-mounted direction can remove rear posts from the immediate doorway zone and create a clean transition from the house. It becomes more difficult when the façade is mostly glass, the door head sits close to the intended roof line or the eaves, gutter, external blinds and drainage already occupy the available fixing area.
A freestanding arrangement avoids direct attachment to the house and may allow the roof edge to sit where it works better beside a wide glazed façade. The trade-off is the rear post line. Those posts should stay outside both the active door opening and the turning area immediately beyond the threshold.

A house-side connection can keep the doorway area visually open, but the door head, solid wall area, eaves and gutter still need to work with the proposed roof line.
Keep Posts Out of the Route From the Door to the Garden
Post positions should follow movement before symmetry. Start at the active sliding-door panel and trace the route to the place people normally go next. That may be a dining chair, barbecue, lawn, side gate or garden path.
Mark each proposed post corner on the paving with painter's tape, chalk or a small box. Then carry something through the route. A tray, laundry basket or folded chair exposes turning space that a normal empty-handed walk can miss.
Furniture changes the route again. Pull every dining chair back to its normal sitting position and leave it there during the test. A post that appears comfortably clear beside a tucked-in table can sit directly in the path once someone is seated.

For a longer glazed façade, test the full path from the active door through the dining or lounge zone instead of choosing post positions from the patio perimeter alone.
Look for the quieter edges
Where the site allows, post positions often feel more natural beside solid wall returns, garden corners or the quiet edge of a furniture arrangement. These areas may support the structure without visually dividing the opening.
Do not forget diagonal movement. When the sliding door sits at one end of the patio and the garden lies toward the opposite side, people may naturally walk diagonally through the space. A post on that line can divide the patio even when the measured clearance on each side looks generous.
Why Adjustable Louvres Can Help Beside Large Glass Openings
Adjustable louvres become particularly useful when the room behind the glass needs different conditions through the day. Open blades can return more visible sky and airflow to the threshold during mild conditions. Changing the blade angle can then provide stronger overhead shade when the sun becomes uncomfortable.
That flexibility can matter beside a kitchen, living room or dining room used from morning through evening. The same opening may welcome more light at breakfast, need stronger shade later in the day and benefit from released warm air after sunset.
Louvres cannot solve every light problem. Low afternoon sun may still enter beneath an open side, so orientation, planting or suitable side protection can remain important. Adjustability is most valuable when the relationship between the roof and the adjoining room genuinely changes through the day.
Choosing P120 or P180 Around Sliding Doors
The model decision should follow the active opening, glazed-wall length and way the patio is used rather than floor area alone. P120 is a useful first comparison when one main doorway controls a compact outdoor zone. P180 becomes more relevant when the roof needs to extend along a longer glazed façade or serve several activities while keeping access clear.


When standard positions still conflict with the opening
A custom direction becomes worth discussing when a standard arrangement repeatedly places a post in the active door route, brings the beam too close to the door head or conflicts with a corner window, low eave, downpipe or another fixed part of the façade.
The purpose of custom planning is not to create an unusual structure for its own sake. It should solve a specific alignment problem that prevents the sliding-door wall from working comfortably.
If that is the main limitation, review the custom pergola planning guide before preparing the enquiry.
If the main question is the overall patio footprint rather than the relationship to doors and windows, the covered patio size checklist is the more relevant planning page. This guide is specifically about projects where the glazing, access, indoor light and view line drive the layout.
Build the Quote Brief Around the Door Wall
Once a likely layout direction is clear, prepare the project information around the relationship between the house and patio. One marked wall photograph, one simple plan view and several clear site images are often more useful than a long written description without reference points.
- Overall dimensions of the doors and nearby windows.
- The active sliding panel and its clear opening width.
- Door-head height and the underside of the eave or gutter.
- Screens, external blinds and operable-window projection.
- A side photograph showing the threshold and any step or paving fall.
- Downpipe, drain, tap, outlet and wall-light positions.
- Patio width and depth with likely post areas marked.
- Furniture shown in its normal used position.
- A photograph taken from inside through the main opening.
- Notes on morning light, afternoon glare and the main walking route.
Do not remove every ordinary object before taking site photographs. A barbecue, planter, hose reel, storage box or dining chair can show how the space really works. An empty staged patio may look cleaner, but it can hide the practical conflict that matters to the final layout.
Label measurements with clear start and finish points. A note such as “height below the eave” can refer to several surfaces, so a marked photograph is safer than a loose number. The same information can then support a more useful first comparison between P120, P180 and a possible custom direction.
- Identify the sliding-door panel people actually use.
- Open every nearby door, screen and window before measuring.
- Check the threshold, eaves, gutter and paving fall.
- Test the proposed beam line from inside at the times that matter.
- Mark proposed post areas and walk the real route with the furniture in use.
- Compare P120 or P180 only after those relationships are understood.
Frequently Asked Questions
Should a patio cover be centred on the whole sliding-door wall?
Not automatically. Start with the sliding panel people actually use and the route immediately outside it. A visually centred structure can still place a post or beam in an awkward position when the active opening sits toward one side of a larger glass assembly.
How can I test whether the beam will block the view from inside?
Use painter's tape across the glass to approximate the proposed beam line, then view it from normal seated and standing positions inside the room. Repeat the test when the room's natural light matters most. It is a visual planning check rather than a substitute for final structural measurements.
Will a patio cover beside large windows make the room darker?
It can change indoor light because roof depth, beam height, orientation and surrounding shade affect how much sky remains visible through the glass. Check the room in the morning, during its strongest sun period and later in the day before judging the effect.
Where should posts sit relative to a sliding door?
Keep the active opening, landing zone and direct route toward the table or garden clear. Solid wall returns and quieter furniture edges can provide better starting areas than positions directly in front of the opening. Final positions still depend on footing, slab, deck and site conditions.
Is P120 or P180 better beside large sliding doors?
P120 is a useful first comparison when one main opening serves a compact outdoor zone. P180 becomes more relevant when the glazed wall is longer, several outdoor activities share the same roof or additional configuration choice is required. The opening and traffic relationship should be checked before choosing by patio size alone.
When should I ask about a custom layout?
Custom planning becomes useful when standard positions repeatedly conflict with the active doorway, beam line, corner glazing, low eave, downpipe or main walking route. The custom change should solve a clear site constraint rather than add complexity without improving the space.
The Next Step Before Ordering
A well-planned patio cover around sliding doors and large windows should make the connection between the house and outdoor area easier, not tighter. The active opening should remain obvious, useful indoor light and views should be considered from inside the room, and the post line should stay outside the route used every day.
Start with P120 when one main doorway controls a compact outdoor area. Compare P180 when the roof needs to follow a longer glazed façade or support several activities. If neither standard direction keeps the opening, beam line and traffic route comfortable, show that conflict clearly when requesting a custom discussion.
Send the active opening dimensions, door-head and eave heights, wall photographs, threshold and drainage details, furniture layout and one clear photograph taken from inside through the glass. These details make it easier to compare P120, P180 and a possible custom direction around the way the space is actually used.
Send Your Patio Details
Share:
Bioclimatic Pergola Explained: What It Means for Outdoor Comfort
Patio Covers for West-Facing Backyards: How to Control Harsh Afternoon Sun