

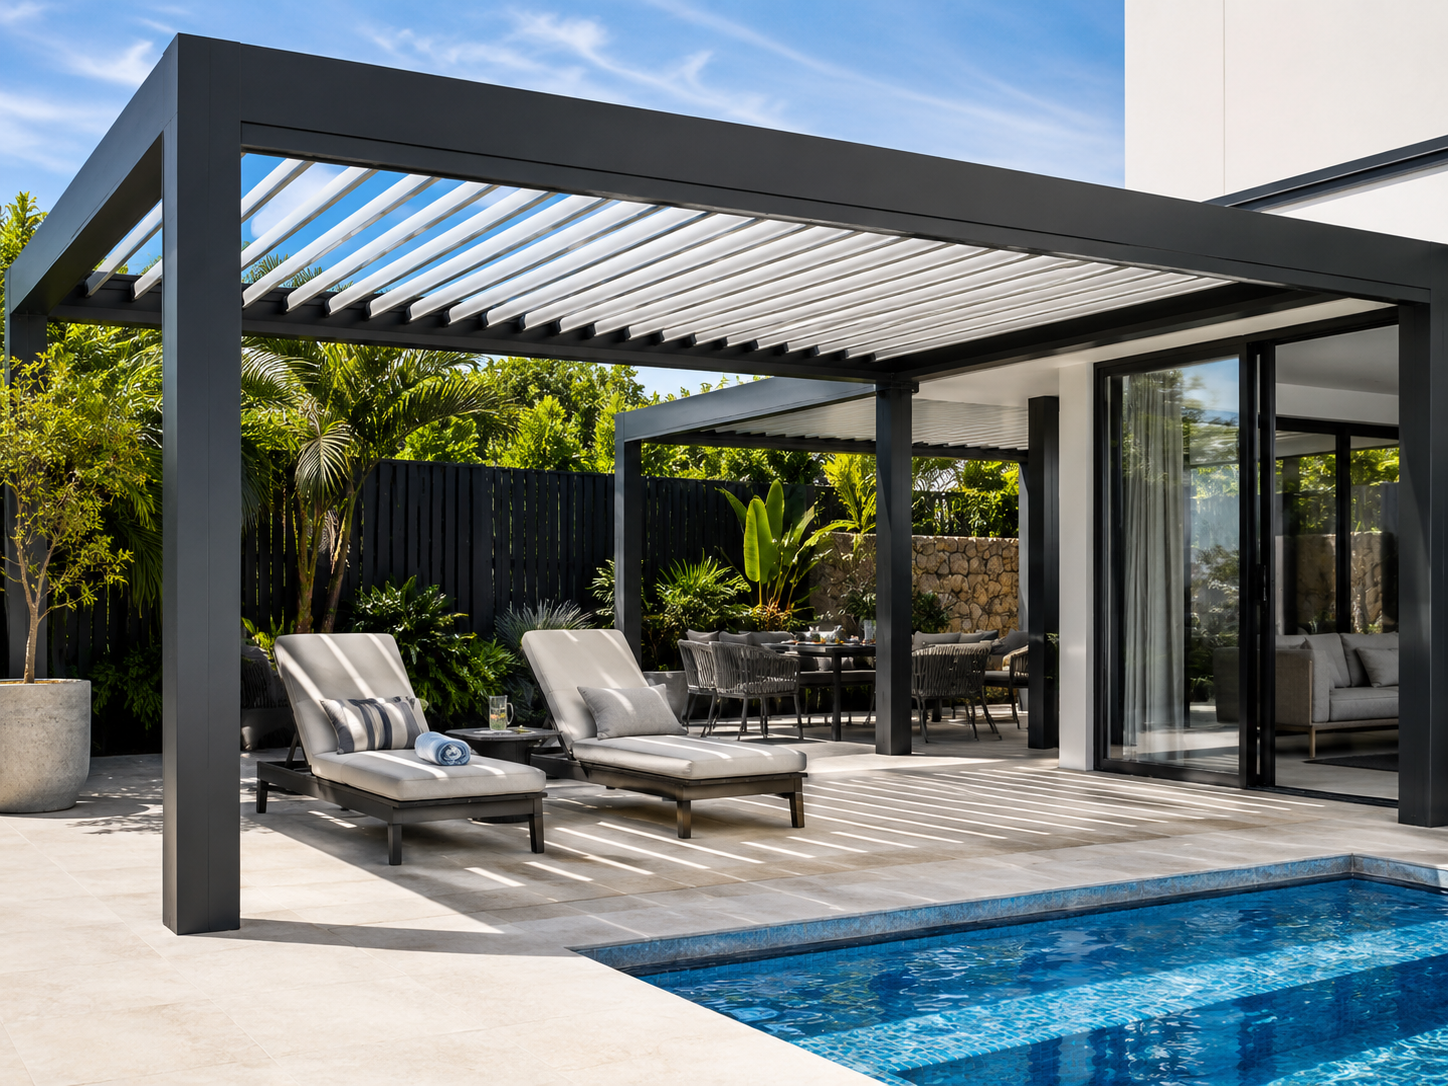
Good poolside louvered roof planning starts with the wet area around the pool, not with the largest roof that can fit on the paving. On a normal summer afternoon, the same few metres may need to handle wet feet, reclined loungers, towels, reflected glare, a cleaner hose, drainage and a clear route back to the house.
The useful question is not simply how much paving can sit beneath a pergola. It is where water regularly reaches, where the main seat falls during the difficult part of the day, where people step after leaving the pool, where equipment needs to pass and which part of the paving stays wet longest. Once those conditions are visible, roof position, post locations, accessories and model size become much easier to judge.
This guide stays focused on the wet-zone decisions that affect a poolside roof: splash, drainage, roof runoff, service access, circulation, furniture placement, airflow and configuration. If you are still deciding between different roof types, the separate guide to how a louvered roof system works explains the broader roof concept. Foundations, electrical work, pool barriers and local approval requirements remain site-specific matters and should be confirmed by the appropriate professionals.
Read the pool area in this order
Water → identify the splash strip, low points and roof-water route before placing furniture or posts.
Movement → protect the route between the pool, towels, seating, house and equipment.
Roof → size and position the covered area around the usable dry zone and the furniture that is actually occupied.
Poolside Louvered Roof Planning Starts with the Wet Zone
Water reaches the poolside area from several directions. It drips from swimmers, sprays during play, travels under wet feet and arrives again as rain. A louvered roof introduces another water path when rain collected overhead is directed away from the covered area.
A practical layout therefore begins with three informal zones. The wettest strip remains close to the pool. A transition area handles towels and movement. The driest section holds upholstered furniture, phones, small personal items and controls that should not remain damp.
Those zones do not need painted lines or identical widths. Their value is in showing where the roof should begin to support daily use instead of simply covering the entire paved rectangle.
Keep the splash strip simple
The paving closest to the pool should be easy to cross, easy to see and easy to clean. Deep planters, decorative baskets and loose side tables can turn the wettest part of the area into an obstacle course.
A clear strip also gives cleaning tools direct access to the coping and fence line. Water can follow the intended surface fall without running around furniture legs. The main seating can begin slightly farther back, where cushions and small personal items receive less repeated splash.
There is no universal width for this zone. Pool shape, barriers, paving construction, drainage and local requirements vary. The useful boundary is the one observed during normal use rather than a generic dimension copied from another backyard.
Look at the paving after a normal swim
A dry morning inspection can hide some of the most useful clues. After several people leave the water, one section may stay wet much longer than the rest. A puddle can form exactly where a sofa, side table or proposed post is meant to sit.
Take a photograph after ordinary pool use. Another image after rain can show whether the same low point is involved. If the intended dry seating zone is already the wettest area on the paving, the layout or drainage deserves attention before the structure is ordered.
Shade can make an existing low point more noticeable because direct sun reaches it for less time. Covering the area does not correct the paving fall. Existing drainage problems are easier to investigate while the surface remains fully accessible.
Roof runoff needs its own route
A pool already contains water, but concentrated roof discharge can still create problems. Water leaving at the wrong point may keep one post corner wet, wash debris toward the coping or send additional flow toward a gate, low paving section or building threshold.
The roof-water route should therefore be considered alongside existing drains, paving falls, garden beds, downpipes and entrances. If one part of the site already remains wet after normal pool use, directing more water toward it is unlikely to improve the situation.
A closed louvre position should not be treated as a promise that everything beneath the pergola remains completely dry. Wind-driven rain can enter from an open side, swimmers bring water beneath the roof and damp items move between zones throughout the day.
A useful drainage check
Photograph the paving once when it is dry, once after normal swimming and once after rain if possible. Compare the same corners each time. A repeated wet point is more useful planning information than a perfectly dry site photo.
Cleaning access belongs in the water plan
Poolside maintenance is mostly made up of small jobs. Leaves collect behind furniture, sunscreen marks appear on tables and damp debris gathers around post bases. Those jobs become irritating when every useful access point is blocked by a pot or sofa.
Storage and planting should stay slightly clear of structural corners. One deliberate planter can look calmer than several small pots around every post, while the area behind furniture should remain reachable with ordinary cleaning tools.
Visible debris around moving louvres or accessible drainage paths should be dealt with using an appropriate maintenance method. Moving components should not be forced if an obstruction is suspected, and work at height requires suitable equipment or professional assistance.
Pool environments may also involve chlorinated water, salt systems and cleaning chemicals. That does not justify describing a pergola as chlorine-proof, salt-proof or maintenance-free unless the selected product specifically supports such a claim. Concentrated chemicals are better kept in their intended equipment or storage area.
Electrical planning deserves separate professional attention. Lighting, motors, controls and cable routes around a wet area should be assessed and installed appropriately. The useful planning point is timing: those routes are much easier to coordinate before posts, furniture or later paving changes restrict access.
Protect Pool and Service Access Before Sizing the Roof
A pergola post occupies very little space on a drawing. Around a pool, the same post can affect several routines at once. Someone may turn beside it with a towel, carry drinks past it, guide a cleaner hose around the base or need to look across it from a low chair.
That is why the first structural outline should come from movement rather than visual symmetry. Mark the common pool exit, main shaded seat, house door and pool equipment. The routes between those points are more useful than making every structural corner appear perfectly centred beside the water.
Two routes deserve separate checks
Pool route: water → towel → shaded seat → house.
Service route: equipment → cleaner storage → pool edge.
If a proposed post interrupts either line, the position deserves another look. A centred structure does not become a better structure when routine movement has to bend around one corner.
Test the first few steps from the water
Most pools develop one preferred exit point. It may be the steps closest to the house or a shallow section beside the loungers. The first stretch of paving beyond that point normally receives much more traffic than the rest of the surround.
Wet feet change the way people move. Steps become shorter, attention stays on the water and a towel can partly block the view of the ground. A clear route is easier to use than one that requires an immediate turn around a structural post or small table.
The pergola itself does not make an existing surface non-slip. Paving suitability, drainage falls and wet-area treatment remain separate site questions.
Check the view from the actual chair
A poolside chair often doubles as the main observation point. The view from that position can matter more than the standing view used while taking measurements. A post that looks harmless at eye level may occupy much more of the pool view from a low lounger.
A broom handle, cardboard tube or temporary marker can represent a proposed corner before installation. Set the chair in its normal position, sit down and look toward the common pool entry, deeper section and connection back to the house.
If the marker sits directly through the main sightline, a modest change to the furniture or roof position may improve the setting. Clear sightlines do not replace active supervision or compliant barriers; they simply avoid adding an unnecessary visual obstruction.
Keep the equipment route easy to use
Pool pumps, filters, covers and cleaning tools rarely appear in lifestyle photographs. They still need access every week. A post or fixed cabinet in the wrong position can turn a straightforward maintenance visit into a furniture-moving exercise.
Equipment lids and panels should be opened while the layout is still flexible. The standing space in front of them matters, as does the route between the equipment and the water. Long poles and cleaner hoses need more turning room than a person walking through the same gap.
A route that only works after moving the sofa is not really a service route. The equipment side can remain visually quiet, but it needs to remain usable after the roof, furniture and side accessories are installed.
Use tape before committing to the footprint
Removable tape can mark each proposed post footprint. Place the largest furniture pieces inside the outline, recline the loungers and pull dining chairs into their occupied position. Then walk from the pool toward the house while carrying a towel basket or tray.
Conflicts tend to appear quickly. A route that looked generous on an empty plan can disappear when a chair is pulled out. One structural corner may sit exactly where the cleaner hose needs to turn.
The surface beneath the tape still requires proper assessment. Existing paving does not automatically confirm suitable structural support, and pool surrounds can contain drains, electrical services and pipework. Foundation and fixing decisions require site-specific confirmation.
Shade Should Follow Real Use, Not Empty Paving
Once the water and service routes are understood, the next question is where the occupied furniture actually needs overhead control. A neat rectangle centred beside the pool can look correct on a plan and still shade half a walkway while the main lounger remains exposed.
Set the furniture out first. Lower the lounger backrest, add the side table and leave space for a towel or sandals. A chair that appears compact while upright becomes a much deeper occupied zone once someone settles into it for an hour.
This exercise can move the proposed roof farther from the water. A shift of half a chair depth may keep the upper body shaded while preserving the clear wet-foot strip beside the pool. It can also avoid making the pergola larger merely to cover unused paving.
Use the difficult hour as the shade test
Midday is not always the uncomfortable period. A west-facing pool can feel calm at 1 pm and become bright later in the afternoon when lower light reaches beneath the roof edge. Another property may receive stronger morning glare across the water toward the seating.
Three photographs can expose the pattern without turning the exercise into a technical sun study. Take one in the morning, another around the middle of the day and one during the late-afternoon period when the pool is normally used. Photograph from the same sitting position.
The images show whether the difficult light comes from above, from the side or from reflection across the water. That distinction matters because a larger roof does not automatically solve low western glare.
Keep this section narrow on purpose
If your main question is freestanding placement, glare timing, P180 versus P180 Pro or general poolside furniture layout, see the dedicated guide to a freestanding pergola beside a pool. This guide keeps the focus on wet-zone, drainage and service-access planning.
Do not cover every paved metre by default
Water, planting and open sky are part of what makes a pool surround feel refreshing. Covering all available paving can turn an open pool edge into a heavier outdoor room without necessarily improving the seating that matters.
A balanced arrangement gives the roof one clear job. It may cover two loungers, a conversation group or a dining table while the immediate wet edge remains open for movement, sunbathing and cleaning.
This is where adjustable louvres can be more useful than simply making the roof larger. A correctly positioned roof with flexible overhead control can serve the occupied dry zone better than a broad structure positioned around empty paving.
Ventilation Around Wet Areas
A pool adds moisture in small, repeated ways. Wet towels hang over chair backs, water remains in paving joints and swimmers cross the shaded zone several times during an afternoon. On a still day, a heavily enclosed seating area can feel noticeably different from the open pool edge only a few metres away.
Open sides matter for that reason. When adjustable louvres are open or angled, they also leave a path at roof level for warmer air to move upward. This can support a more open feeling beneath the structure, although it should not be treated as a guarantee against humidity, dampness or mould.
More enclosure is not automatically better
It is easy to look at blinds or glass and assume that protecting every side will make the pergola more complete. Around a pool, that can work against the space. Closing several edges can reduce useful cross-air movement and make the route between the water and seating feel less direct.
Start with the side that repeatedly creates a problem. One boundary may receive low western sun. Another may sit directly in a breeze travelling along the house. Treating that edge can improve comfort while the rest of the structure remains visually and physically open.
Side protection must also respect the way the pool works. A blind should not be treated as a substitute for compliant pool fencing or a gate. Gate movement, sightlines and local pool requirements remain separate considerations.
Read the surroundings before adding hardware
Air movement is often shaped by what already surrounds the pool. A high wall can leave one corner still. Dense planting may slow the breeze behind a sofa, while a narrow gap beside the house can channel air toward one exact chair.
Spend a few minutes at the planned sitting position. Lightweight planting, leaves or a hanging towel can show where air arrives, where it slows and whether one direction is consistently uncomfortable.
Furniture can then support the site instead of fighting it. A deep sofa pushed tightly against a wall tends to make that corner feel more closed. Lower-backed chairs, a small gap behind the furniture or one open corner may improve the experience without adding another accessory.
Give wet towels their own place
This sounds minor until several damp towels cover every chair back. The seating immediately looks occupied, and moisture sits directly against cushions or upholstery. A deliberate towel point can make the whole zone easier to use.
The useful position is normally close to the main pool exit but outside the walking line. It should also remain clear of electrical controls, lighting connections and moving accessory parts. The goal is a short movement from water to towel without turning the main lounge into a drying rack.
Closed storage deserves the same thought. Damp towels or swim items placed in a box at noon may still be wet much later. Dry cushions and clean textiles are better kept separate from anything that has just come out of the pool.

Plan Seating Without Losing the Dry Zone
A poolside roof earns its space by protecting real activities rather than empty square metres. Twenty square metres of overhead cover is not especially useful if the main chair still falls outside the comfortable zone while the dry circulation area is squeezed.
Start with the pieces that stay outside most often. Two loungers used every weekend deserve more influence than folding chairs brought out for occasional gatherings. The permanent table, towel point and pool-facing seat should shape the usable footprint first.
Measure loungers at full use
An empty lounger is easy to underestimate. Lower the back and the footprint grows. Add feet, sandals, a towel and a small side table, and the occupied area becomes noticeably deeper and wider.
The chair angle also deserves a test. Loungers do not need to sit perfectly square with the water simply because the paving does. Turning them slightly can reduce reflected glare while preserving a comfortable view across the pool.
A little space behind the head end helps cleaning as well. A chair pushed tightly against a post or wall creates a narrow strip that catches leaves and small objects. A reachable gap prevents the furniture from feeling wedged into the frame.
Different furniture groups change the dry footprint
A sofa with two chairs behaves differently from a row of loungers. The group normally needs a low table in the middle and one open edge toward the pool. Pushing every seat against the outside of the pergola can leave an empty centre while the perimeter feels crowded.
A deeper sofa often works on the more protected side. Lighter chairs can sit closer to the open edge and move slightly as conditions change. A dry table is useful for phones, sunglasses and drinks that should not end up on wet paving or the pool coping.
Dining introduces another traffic pattern. Chairs pull back, plates arrive from the house and people cross behind the table carrying glasses. The dining setting should not occupy the narrowest point between the house door and the pool.
Pull every dining chair out as though the table were full and walk behind them with a tray. If the route works only while the chairs remain tucked in, the layout will feel tight as soon as a meal begins.
Table finish can affect comfort too. A glossy surface facing the pool may add another source of reflected light. Orientation and roof adjustment may solve that problem without enclosing another side.
Do not stop the roof exactly at the furniture edge
A roof drawn tightly around furniture looks efficient on paper. Shade does not remain directly beneath the same roof edge all day, so the outer chair or table corner can still move into direct sun even though everything technically fits inside the structure.
A modest allowance around the occupied zone is normally more useful. That allowance does not need to be identical on every side. An exposed western boundary may deserve more attention than an edge already protected by the house.
Larger is still not automatically better. Extra roof area can introduce more posts, affect nearby windows and reduce the open character of the pool. The aim is enough usable dry space for normal activity, followed by a clear point where the structure stops.
Put these five things on the paving before measuring the roof
1. Lounger at full recline
2. Side table in its normal position
3. Towel or drying point
4. Dining chair pulled back
5. Cleaner and service route
Accessories Should Solve a Real Poolside Problem
A pergola does not become more useful simply because more accessories are attached to it. The options that tend to earn their place solve something that happens repeatedly: low sun across one chair, a breeze from one exposed side or a seating area that remains in use after dark.
If the problem cannot be described clearly, the accessory probably does not need to be chosen yet. Wet-zone planning, drainage, roof position and circulation should be settled before side protection or lighting becomes the priority.
Treat the exposed edge, not every edge
Consider two loungers that remain comfortable until late afternoon. The roof still provides overhead shade, but low western sun begins to reach the chairs from one side. That is a clear reason to consider targeted side protection on that boundary.
The same logic applies to wind. A narrow passage beside the house may channel a breeze through one corner while the rest of the backyard remains calm. Treating that side can improve the sitting zone without turning the pergola into a heavily enclosed room.
The accessory still needs to remain clear of pool gates, equipment access and important circulation. It should not be assumed to act as a compliant pool barrier or safety screen.
Keep evening lighting calm around water
Pool water reflects light easily. One harsh source can create glare across the surface and make darker parts of the paving feel even darker. Soft, even illumination beneath the pergola normally suits a lounge or dining zone better than one bright fitting attempting to light the entire backyard.
The table, main chairs and transition toward the house are the obvious areas to consider first. Pool-edge and pathway lighting remain separate parts of the wider site plan. Integrated pergola lighting should not be expected to replace every other lighting requirement.
The view from inside the house matters as well. Large glass doors can reflect bright fittings back into the room. A calmer light level beneath the roof may preserve the view toward the pool more successfully than an overly bright outdoor-room effect.

More enclosure deserves restraint beside a pool. Multiple blinds, glass and other additions can change the character of an open wet area quickly. If roof adjustment and one targeted accessory already solve the repeated problem, another layer may increase maintenance and reduce openness without improving daily use.
Accessories also affect installation details. Power, cable routing, moving clearances and cleaning access are easier to coordinate while the roof layout is still being planned. Adding them only after the structure and furniture are fixed can create compromises that were avoidable earlier.
From Site Conditions to Roof Configuration
Model comparison becomes useful only after the occupied dry zone, wet strip, service route and drainage constraints are visible. Pool dimensions alone do not answer the roof question. A large pool with two loungers may need less covered space than a smaller pool beside a dining table and sofa group.
The configuration should follow the real usable footprint, required span, building relationship and the small number of accessories that genuinely improve the setting. Choosing the roof first and then forcing the poolside routine underneath it often creates unnecessary compromises.
A compact lounge behind the splash strip
Two loungers and a small dry table form the simplest arrangement. The roof sits behind the main wet strip, the furniture occupies the centre and the immediate pool edge stays open for movement and cleaning.
A compact shaded area often works well where the pool is used casually and the main need is a comfortable place between swims. There is little reason to increase the roof footprint simply to cover unused paving.
A larger lounge and dining zone
A dining table and lounge beneath one roof ask more from the footprint because two different activities share the dry zone. The dining setting needs pulled-out chair clearance and a serving route. The lounge needs depth, a pool view and room for side tables.
The two areas should not be squeezed together simply to fit one rectangle. Dining often works closer to the house, where food and drinks arrive. The lounge can occupy the clearer pool-facing portion of the covered area.
This is where a larger roof becomes worth comparing. The reason is not that the pool itself is large; it is that the occupied dry footprint now includes two regular activities plus circulation.
A narrow pool makes service access the limiting factor
Picture a long pool with the house on one side and a boundary on the other. The paving may look generous while empty, but fully reclined loungers take much of the available depth and the cleaner route still needs to pass along one side.
In this situation, the service route can become more important than maximum roof length. A shorter shaded pocket around the loungers may preserve the wet and maintenance routes better than extending the structure along the entire pool.
A pool beside large sliding doors makes the house part of the decision
When the pool sits directly outside large doors, the same strip of paving may become the indoor-outdoor route, towel zone and dining area. Building thresholds, existing drainage, daylight and reflections all start to matter alongside the pool itself.
The structure should not crowd the doorway simply to move closer to the water. Furniture can shift along the pool so the opening remains generous. Roof depth and orientation also deserve attention where daylight into the house matters.
A wall-mounted configuration may suit the setting when the building connection works. A freestanding layout can be more practical where the wall, eaves or drainage create complications. Neither option should be chosen by appearance alone.

What to Prepare Before Comparing Pergolas
A useful poolside enquiry needs more than one width measurement. The roof has to work around fixed boundaries, occupied furniture, wet paving, drainage and equipment. A small group of clear photographs can make the first configuration comparison much more useful.
There is no need for a polished architectural drawing at the early stage. Practical information matters more: where the pool ends, where the main furniture sits, how the cleaner reaches the water, where the house threshold falls and which part of the paving remains wet after use.
Photos worth preparing
- The complete pool boundary viewed from the house.
- The same area looking back toward the house.
- Main seating with loungers or chairs in their normal occupied position.
- Pool equipment, cleaner connection and the route used to reach them.
- Existing drains, downpipes and visible low points.
- The paving after normal pool use while the wet pattern is still visible.
- The seating area during the hardest sun period.
Measure usable space rather than total paving
The full paved rectangle includes areas that may never suit a chair or post. Gates, pool barriers, drains, steps, doors and equipment remove part of the apparent space. Occupied furniture and circulation remove more.
Record the clear distance between fixed boundaries at more than one point. Add the real furniture footprint, including reclined loungers and pulled-out dining chairs. What remains is much closer to the area genuinely available for the structure.
Show the equipment even when it is not attractive
The pump, filter and cleaner connection belong in the planning photographs. So does the path used to reach them. Leaving those items out of the initial discussion increases the chance that a post or sofa ends up in the wrong place.
The service zone can remain visually quiet when the project is complete. It simply needs enough room to work. A comfortable poolside design should not require dismantling the lounge every time routine maintenance is needed.
Keep professional checks separate from product choice
Choosing a pergola does not confirm that a proposed post position is structurally suitable. The same applies to drainage, electrical work and pool barriers. These questions should stay visible rather than being assumed to resolve themselves once a roof size is selected.
Foundations, fixing methods, drainage, electrical installations, pool safety requirements and local approvals should be reviewed appropriately for the property. Starting those checks early leaves room to adjust the roof and furniture while the plan is still flexible.
Frequently Asked Questions
A Better Next Step Than Guessing the Roof Size
The starting order is straightforward: identify the wet strip and low points, protect the pool and service routes, place the real furniture, then decide which part of that footprint actually needs overhead control. After that, check difficult sun, roof runoff and equipment access before narrowing the roof size.
A compact lounge may only need a modest configuration. A larger dining-and-seating area may justify comparing P180 Pro. Wind blinds and lighting should come later and answer a specific exposed edge or evening-use requirement rather than being selected automatically.
Before comparing models, prepare the pool boundary measurements, furniture footprint and photographs of the seating, equipment route, paving and drainage. Include one image taken while the paving is wet and one during the hardest sun period. Those details give the product discussion a much stronger starting point than a guessed roof size.
Compare the measured layout, not an empty rectangle
Use the measured dry seating area and circulation plan to compare Everpergo pergola configurations. Where the plan includes a broad lounge or combined dining-and-lounge zone, P180 Pro is one model worth reviewing.
Once the likely configuration is clearer, use the Need help? option on the relevant product page and provide the pool boundary, furniture, equipment, wet-paving and drainage photographs. That gives the project discussion a practical starting point instead of relying on one overall width measurement.
Compare Pergolas
Share:
Pergola Kit Delivery Checklist: Access, Storage and Site Preparation Before Arrival
Patio Roof Planning for Homes With Existing Gutters and Downpipes