

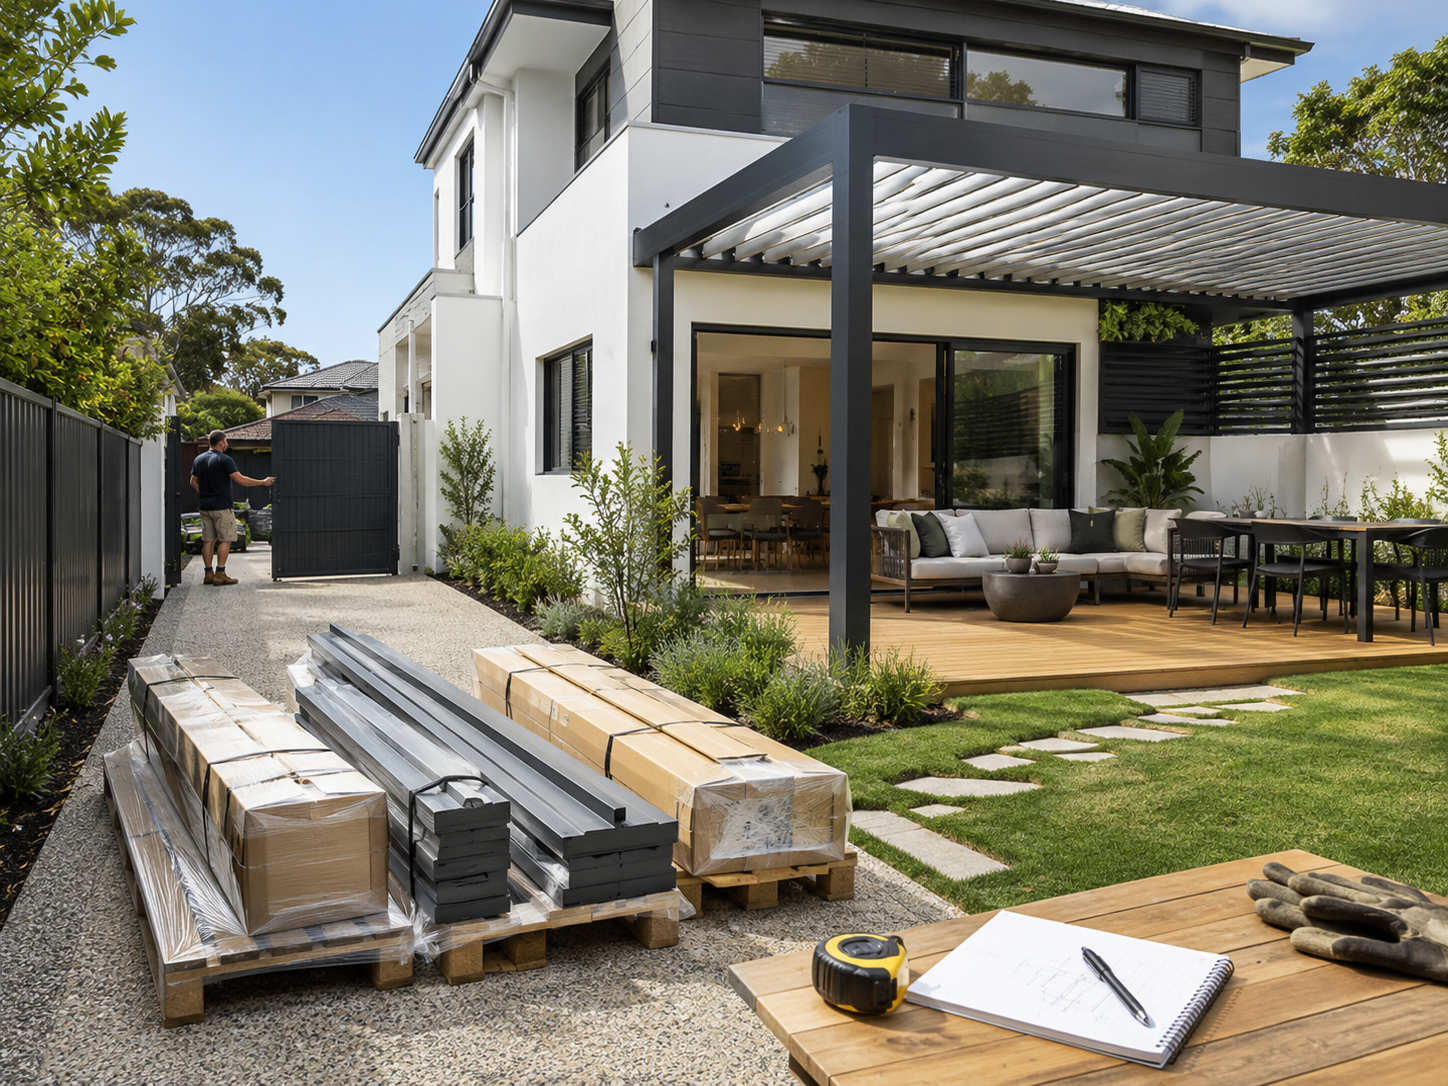
Order confirmation feels like the finish line, but delivery day is where the practical part begins. This pergola kit delivery checklist focuses on the site conditions that need to be ready before the order arrives. A pergola kit may arrive for a compact paved courtyard, a broad deck beside the house, or a larger outdoor zone that will become a dining and lounge area. In every setting, the same four questions matter before dispatch: can the vehicle reach a workable unloading point, is there a safe place for packaged components, is the installation area ready for professional review, and will the right people be present when the order arrives?
This guide starts after the model, size and configuration have been confirmed. It does not repeat a pre-purchase checklist, compare roof types, or decide whether a freestanding or wall-mounted layout is better. Instead, it focuses on the final stretch before arrival: the street approach, driveway, gate, unloading zone, temporary storage, surface record, packaging inspection, labour planning, weather check and handover routine.
A smooth delivery rarely depends on one dramatic decision. Usually, it comes down to small details noticed early: a parked car that blocks a turning point, a gate that opens inward, a low branch over the driveway, a stack of pavers occupying the only dry storage area, or a nominated receiving person who has not seen the order details. Clearing those details before the truck is on the road prevents rushed decisions at the kerb.
The practical target: by the time dispatch is confirmed, the route is known, the unloading point is clear, the storage area is dry, the installation zone is tidy, the receiving contact is available, and any unusual access condition has already been discussed.
A simple delivery path
Reach the site
Check street approach, turning room, driveway width and overhead clearance.
Unload cleanly
Keep one practical unloading point clear before the vehicle arrives.
Store safely
Use a dry, level area away from vehicles, active work and the final footprint.
Keep the footprint open
Leave the installation zone accessible for inspection and later assembly.

Confirm Delivery Access Before a Pergola Kit Is Dispatched
Delivery access should be read as a route, not as a single gate measurement. The route begins where the vehicle leaves the public road and ends where the packaged order can be placed without blocking traffic, damaging landscaping, or forcing long components through a tight corner. A gate may be wide enough on paper while the approach angle makes it unusable. Likewise, a broad driveway can still fail as an unloading area when the slope is steep or the turning space is occupied.
A useful check starts from the street. Stand at the likely vehicle approach and look for parked cars, narrow road shoulders, median strips, tight bends, steep entries, overhanging trees and overhead services. Then walk the intended path at package level rather than eye level. Long beams do not turn like a person carrying a small box, so a corner beside a fence, rainwater tank or garden wall deserves more attention than the open width alone.
The street approach matters more than it looks.
On a quiet suburban street, the main issue may be a vehicle parked opposite the driveway. In a townhouse lane, the harder point may be the ninety-degree turn between a shared wall and a garage. Rural and regional properties can present a different set of questions, including unsealed approaches, soft shoulders, long internal drives or turning areas that change after heavy rain. None of these conditions automatically prevent delivery, but each one should be raised before dispatch rather than discovered during unloading.
Measure the clear opening, not the nominal opening. Gate posts, hinges, latches, wall-mounted lights and inward-swinging leaves can reduce the usable width. Where double gates meet in the centre, check whether both sides open fully and stay secured in wind. A removable section of fence may appear to solve the problem, yet that idea still needs advance planning, safe handling and permission from the relevant property authority.
Overhead clearance matters as well. Low branches, carport roofs, cables, awnings and building projections can limit access even when the ground route is generous. The safest approach is to photograph the route from several angles and record the narrowest point. A short video taken while walking from the road to the unloading zone can also reveal turning restrictions that a single photograph hides.
The unloading point should still work after the vehicle leaves.
The best unloading point is not always the closest point to the installation footprint. It is the place where packaged components can be transferred safely, set down on a stable surface and moved again without crossing active traffic. A clear garage apron may work better than a narrow side path beside the patio. Similarly, a level section of driveway may be preferable to a lawn that becomes soft after overnight rain.
Mark the intended position with cones, chalk or a temporary sign the evening before arrival. Then remove vehicles, bins, trailers, play equipment, garden tools and loose materials from the route. A two-metre gap between parked cars can look generous until a long package needs to pass without scraping paintwork. Leaving more room than seems necessary is the better choice.
One person should own the handover.
A receiving name and mobile number should be confirmed before dispatch. That person needs more than a delivery window. The order reference, model or configuration, expected storage area, unloading point and inspection steps should be available in one short note. When the nominated person is a neighbour, relative, property manager or site supervisor, the same information still matters.
The receiving person should be able to identify visible packaging damage, photograph the order and avoid signing without a basic check. A rushed handover creates uncertainty later, especially when several bundles look similar from a distance. Even a five-minute briefing can prevent the common situation where the order is accepted, moved twice and only then inspected.
Phone availability matters on the day. A silent phone inside the house can leave the vehicle waiting outside a locked gate. For apartment, commercial or managed-property sites, the gate code, loading-zone instructions and any building access process should be confirmed in advance. The aim is not to predict every detail. It is to remove the details that can be settled before arrival.
Access record to prepare before dispatch
- Street approach and any turning restriction.
- Driveway width, slope and clear opening at gates.
- Overhead branches, cables, roofs or awnings.
- Preferred unloading point and backup point.
- Distance and route from unloading to storage.
- Receiving name, mobile number and site access notes.

Choose a Safe Temporary Storage Area
Temporary storage is part of the delivery plan, not an afterthought. A pergola kit may remain packaged for a short period while the installation team, weather and site readiness line up. During that gap, the storage area needs to protect the order without placing it in the way of cars, foot traffic, gardening work or other trades.
The strongest choice is usually a level, dry and sheltered area close enough to the installation zone to reduce repeated handling. A garage, enclosed carport or secure covered workspace can suit this purpose when the floor is clear and the route remains wide. An open driveway can sometimes work for a very short handover period, although exposure to weather and vehicle movement makes it a weaker long-term option.
A dry, level space beats a convenient corner.
A neat lawn beside the house may look convenient, yet soft ground can settle unevenly beneath packaged components. Morning dew, irrigation and sudden rain can also affect cardboard, labels and protective wrapping. By contrast, a plain concrete garage floor may not appear elegant, but it gives a more stable base and makes it easier to see moisture, impact marks or debris before anything is placed down.
Avoid placing long packages directly across uneven pavers, garden edging or a surface with scattered stones. Small high points can concentrate pressure on the packaging. Where suitable supports are needed, their type and spacing should be confirmed with the installation or product team rather than improvised from loose bricks, timber offcuts or paint tins.
The storage area also needs enough room around the order. A narrow strip against a garage wall can hold a package, but it may leave no safe space for inspection or later lifting. Allow a clear walking line along at least one side and keep doorways, power boards, gas equipment, hot-water units and emergency access points unobstructed.
Storage should sit outside the active work zone.
A pergola delivery often overlaps with paving, landscaping, painting or deck work. That overlap creates risk. Cutting dust, wet mortar, sparks, wheelbarrows and repeated foot traffic can damage packaging long before assembly begins. The safe answer is a dedicated zone with a simple boundary, not a pile of components squeezed beside whichever trade arrives next.
Storage should match the confirmed order.
Storage needs vary with model, size and layout. A compact manual system for a small courtyard does not create the same staging problem as a wider motorised louvre roof system intended for a large entertaining area. Wall-mounted and freestanding configurations can also involve different groups of components, so the order confirmation should remain available while the space is prepared.
Package length, component groups and staging space vary across the range. The confirmed pergola kit, not a photograph of another model, should guide how much floor area and handling space is reserved before delivery. This is especially useful when a wall-mounted layout, freestanding layout or larger louvre roof system creates a different staging footprint.
Keep related bundles together without rearranging them unnecessarily. When labels identify sections, orientation or package groups, leave those labels visible. Moving one bundle to a shed, another to the side yard and a third behind the garage may seem practical in the moment, yet it makes inventory checks and installation staging harder.
A one-page sketch is enough.
A rough sketch can prevent confusion when several people are involved. Draw the unloading point, storage zone, installation footprint and walking route on one page. Add fixed obstacles such as steps, pool fencing, air-conditioning units, downpipes and narrow passages. The sketch does not need to be architectural. It only needs to show where each activity happens.
For a townhouse with side access, the best plan may place the order in the garage and move components through the side gate on installation day. For a broad rural property, the storage zone may sit closer to the work area, provided it remains dry, secure and away from machinery. For a deck behind the house, the most sensible choice may still be the front garage because the deck itself should remain open for inspection and setup.
The main principle is direct: store once, move once. Repeated movement adds handling without adding value. A package carried from driveway to lawn, then from lawn to garage, then from garage to the patio has faced three opportunities for impact, dragging or confusion.
Good storage is boring. The floor is level, the area is dry, the route is clear, labels remain visible, no vehicle passes nearby, and nothing else is stacked against the order. That plain setup is exactly what protects the project.

Check the Installation Surface Before Delivery
The installation surface should be documented before arrival, but this stage is not the place for casual structural conclusions. Concrete, paving, decking and other bases can look sound while still requiring professional assessment for the intended fixing method and loads. Delivery preparation should create a clear record and an accessible work area. It should not replace the installer, engineer, builder or other qualified professional responsible for site-specific decisions.
A useful surface record captures what is visible now. Photograph the full footprint, each proposed post area, nearby edges, level changes, cracks, drains, joints, steps and transitions between materials. Include a tape measure or another clear reference where dimensions matter. Wide photographs show context, while close views show texture and condition.
For concrete, record what is already there.
An existing slab can appear flat from the back door and look quite different at ground level. Hairline cracking, patch repairs, tile overlays, expansion joints and edges close to garden beds should be recorded. The presence of concrete alone does not confirm that it suits the planned installation. A suitable professional should confirm the actual condition, thickness, reinforcement, edge distances and fixing approach where those factors are relevant.
Clear the surface before photographs are taken. Outdoor rugs, planters, furniture and storage boxes can hide cracks or joints that later affect post placement. A clean photograph taken two days before delivery is more useful than a hurried image captured after components are stacked across the patio.
Do not drill test holes, remove finishes or make structural alterations only to “get ahead.” That work belongs within an agreed installation plan. Premature changes can damage a usable surface, create water-entry points or make professional assessment harder.
For pavers and tiles, protect the staging path.
Paved areas introduce two separate questions. One concerns the suitability of what sits beneath the visible finish. The other concerns protection during unloading and assembly. A paver can chip when a heavy component is set down on one corner, even when the broader base is later confirmed as suitable for the project.
Record loose units, hollow sounds, uneven sections, cracked tiles and areas where paving meets the house or garden. Then keep the installation zone free from temporary package storage. The footprint may need to be measured, marked or assessed before assembly, and stacked materials can hide exactly the details that require review.
For decks, keep inspection access open.
A deck can look ready because the boards are clean and the furniture has been moved. Still, the visible boards are only the upper layer. Framing, joists, bearers, posts, footings, waterproofing details and access below may influence the installation approach. A competent professional should assess those conditions before work begins.
From a delivery perspective, keep the deck open. Avoid stacking the order across boards that still need inspection, and do not block hatches or access points. Where stairs provide the only route, measure the clear width and turning space, then consider whether long components can move through without striking balustrades, walls or roof edges.
For unfinished or mixed surfaces, document first.
A garden area, unfinished landscaping zone or mixed surface can be part of a future patio cover project, yet delivery planning should remain conservative. Mark the intended footprint, record ground levels and keep machinery routes separate from the stored order. If excavation, new concrete, drainage or retaining work is still planned, confirm the sequence before dispatch.
The safest timing is usually to complete messy or ground-disturbing work before the packaged system occupies the site. Wet concrete, soil piles and open trenches do not mix well with temporary storage. On the other hand, closing every access route too early can make later movement difficult. The sequence needs one coordinated plan rather than isolated decisions.

Protect Components Before Assembly
Protection begins at handover. The first job is not to open every bundle or move the order out of sight. The first job is to look at the packaging while the delivery is still present, photograph its condition and follow the current receipt process. Everpergo’s Shipping & Return page should remain the reference for damage, missing-item, return and custom-order rules because those details can change.
Start with wide photographs that show the complete order where it was unloaded. Then capture each side, the ends of long packages, labels, straps, punctures, crushed corners, wet areas and any visible opening in the wrapping. A close image of damage is useful, but a wider image proves where that damage sits on the package and how the bundle looked at receipt.
Inspect the order before moving it.
Moving packages immediately can blur the condition record. A scrape that appeared during delivery may be hard to distinguish from a scrape caused while carrying the bundle through a gate. Where the unloading position is safe, complete the visible inspection before relocation. If the vehicle must move quickly, take the essential photographs first and then transfer the order carefully.
Keep the order reference and receiving notes ready. When a visible issue appears, record it clearly rather than relying on memory. The wording does not need to be dramatic. “Crushed lower corner on long package, photographed before movement” is more useful than “box damaged.” Specific notes help the support team understand the location and sequence.
Check the number of major packages against the available delivery information without assuming that every component is boxed separately. Packaging methods can vary by model and order. When the count or labelling seems unclear, photograph the full group and request confirmation instead of opening bundles to create a private inventory system.
Long packages need controlled handling.
Dragging is tempting when a package is only a few metres from the storage zone. It is also one of the easiest ways to damage corners, tear wrapping and place stress on the contents. Long sections should be handled with enough people and in the manner recommended for the order. A smooth concrete floor does not make dragging harmless.
Plan the lift before touching the package. One person should call the movement, the path should be empty, and the destination should already be clear. Halfway pauses beside a wall or gate create awkward loads. A direct transfer with controlled turns is safer than improvising each metre.
Avoid leaning long bundles against fences, brick walls or garage doors unless the product team or installer has confirmed that position. A package that appears stable can slide when wind catches the wrapping or when another person brushes past. Flat, supported storage is generally easier to protect and inspect.
Keep packaging and labels intact.
Early unpacking creates three problems. It removes protection, separates labels from components and fills the storage zone with loose material. Opening everything also makes it harder to preserve the original condition if a question arises. Unless the current instructions require a specific inspection step, keep the packaging intact until the installer or assembly plan calls for it.
When a bundle must be opened for an authorised check, photograph it before and during opening. Keep fasteners, small parts and paperwork together in a clean container. Do not place loose hardware on pavers, grass or the top of another package. Small parts disappear quickly when several people start moving materials.
Weather exposure starts at unloading.
A dry indoor area is preferable. When that is not possible, discuss suitable temporary protection before delivery. Throwing a loose tarp over packages may look adequate, yet wind can rub the cover against surfaces, water can collect in low points and trapped moisture can remain unnoticed. The method should suit the packaging, forecast and storage duration.
Keep sprinklers and irrigation away from the storage zone. Likewise, avoid roof edges where concentrated runoff lands during rain. A carport can provide overhead cover while still allowing water to blow in from one side. Check the area during actual rain if possible, not only on a dry afternoon.
Receipt sequence that keeps the record clean
01 · RECORD
Confirm the order reference, then photograph the full delivery, package ends, corners, labels and wrapping before anything moves.
02 · CHECK
Note visible concerns clearly and keep the receiving record together. Use the current Shipping & Return process when something needs attention.
03 · MOVE & STORE
Move packages through the cleared route without dragging, then keep related bundles together in the prepared dry area with labels visible.
Plan Labour, Tools and Weather Around Delivery Day
Delivery readiness and installation readiness overlap, but they are not the same. A clear driveway does not mean the site is ready for assembly. Before arrival, confirm who will move the packages, who will inspect the surface, who will lead installation and who will keep the work zone safe. One name beside each responsibility is better than a group assumption.
Avoid a generic tool list copied from another project. The correct equipment depends on the confirmed model, configuration, surface, installation method and professional plan. The installer should review the current instructions and identify what needs to be available. That approach is more reliable than gathering a large collection of tools and hoping the right ones are present.
Clear roles reduce delivery-day confusion.
For a weekday delivery, the receiving person may not be part of the installation team. In that case, prepare a short handover note with the storage sketch, contact numbers and inspection steps. The note should fit on one page. A twenty-message phone thread is hard to use while a vehicle waits at the gate.
Confirm lifting capacity through the installer or logistics contact rather than guessing from package appearance. Large aluminium components can look manageable because the material appears clean and light, yet length and balance change how they need to be handled. Enough capable people should be available for the planned movement.
Tools should follow the approved instructions.
Keep the installation manual, order confirmation and any model-specific instructions together. Download or print them before delivery if that supports the planned workflow. A phone screen can be difficult to share outdoors, especially in bright light or light rain. A clean printed copy in a clear sleeve can be useful during staging.
The tool check should include condition as well as presence. A damaged lead, flat battery, blunt bit or missing charger can stop work even though the tool appears on the list. Where access equipment or lifting equipment is required, confirm suitability and availability in advance with the responsible professional.
Do not let tool staging consume the storage zone. Create a separate area for equipment, fixings and protective materials. Mixing tools with packaged components leads to items being placed on top of the order, labels being covered and walkways narrowing as the day progresses.
Weather can change the sequence.
Weather does not only affect installation. It affects unloading, package handling, surface condition and temporary storage. Rain can make pavers slippery, soften lawn edges and send runoff through a storage area that looked dry earlier. Wind can make long wrapping difficult to control and increase risk around loose packaging.
Check the forecast forty-eight hours before arrival and again on the morning of delivery. If the forecast changes, decide whether the plan needs a covered unloading stage, extra surface protection or a revised installation date. Delivery and assembly do not have to happen on the same day. Keeping those decisions separate can reduce pressure.
A quiet work zone is easier to manage.
Children, pets and visitors should stay outside the unloading and assembly zones. This is not only about heavy components. Straps, wrapping, tools and temporary supports can create trip points that are easy to miss. A closed gate and a clear verbal plan are better than repeated warnings during lifting.
Coordinate other work as well. A landscaper arriving with a trailer, a pool service visit or a waste collection can block the same driveway needed for delivery. Check the calendar for the full day, not only the expected arrival window. A quiet two-hour slot is of little use when the access route becomes blocked immediately afterwards.
Final 48-Hour Pergola Kit Delivery Checklist
The last two days should be used for confirmation, not redesign. By this point, the order details are settled and the pergola kit delivery plan should fit on one page. Walk the route once in daylight, once near the expected delivery time and once after any vehicles or bins have returned to their normal positions. Small conflicts often appear only when the site is in its ordinary rhythm.
The checklist below is deliberately practical. It does not decide structural suitability, electrical work or local approval. It makes sure the site can receive, inspect and protect the order while the qualified professionals retain responsibility for installation conditions.
Forty-eight hours before arrival
- ☐ Confirm the delivery contact name and mobile number.
- ☐ Confirm the order reference, model, size and configuration.
- ☐ Review the current delivery and receipt requirements.
- ☐ Photograph the street approach, driveway, gate and unloading point.
- ☐ Measure the narrowest clear opening and note overhead restrictions.
- ☐ Check the weather forecast for delivery and the following storage period.
- ☐ Confirm the temporary storage area is level, dry and secure.
- ☐ Confirm enough capable people are available for the planned movement.
- ☐ Send the route and storage sketch to everyone involved.
The evening before arrival
- ☐ Move cars, trailers, bins, bicycles and garden equipment from the route.
- ☐ Secure gates fully open where appropriate and permitted.
- ☐ Trim or tie back only minor vegetation that safely blocks the path.
- ☐ Mark the unloading position and keep a backup position clear.
- ☐ Remove furniture, rugs and planters from the installation footprint.
- ☐ Take current photographs of the clean installation surface.
- ☐ Place the order reference, phone numbers and inspection notes together.
- ☐ Charge phones and any equipment confirmed by the responsible installer.
- ☐ Close sprinklers or irrigation near the storage and unloading areas.
At delivery
- ☐ Keep the receiving phone on and remain near the access point.
- ☐ Direct the vehicle to the agreed point without last-minute route changes.
- ☐ Photograph the full order before packages are moved.
- ☐ Inspect visible faces, corners, ends, straps, wrapping and labels.
- ☐ Record visible concerns on delivery documents where applicable.
- ☐ Move packages through the cleared route without dragging.
- ☐ Keep labels visible and related bundles together in storage.
- ☐ Report unusual damage, missing items or delivery issues promptly.
One final check matters after the vehicle leaves: inspect the route for dropped straps, torn wrapping or surface damage, then photograph the stored order. That last image closes the handover record. It shows where the components were placed and how the packaging looked after movement.
Frequently Asked Questions
Before Dispatch: Make a Ready, Review or Hold Decision
By the final day before dispatch, the site should be easy to understand without another round of redesign. A practical ready-to-receive site has one workable vehicle route, a defined unloading point, a dry temporary storage area, a clear installation footprint and a named receiving contact who has the order details. The purpose of the final check is to decide whether those conditions are genuinely settled or whether one unresolved access or storage issue still needs review.
Ready for dispatch
The narrowest clear access point has been measured, overhead restrictions are recorded, the unloading and backup positions are available, the storage area is protected, and the receiving person knows how the delivery will be photographed and checked before movement.
Review before dispatch
The route appears workable but includes a steep driveway, sharp turn, shared lane, unusual gate, long internal carry or weather-exposed storage area. Send the relevant measurements and photographs before the vehicle is committed so the uncertain point can be discussed rather than improvised on arrival.
Hold the handover plan if the route is not actually clear
A blocked unloading point, inaccessible storage area, active excavation, unresolved surface work or unavailable receiving contact should not be treated as a minor detail. Resolve the specific conflict first, then confirm the current Shipping & Return requirements before the delivery plan is considered complete.
Unusual access is easier to solve before dispatch.
Have the delivery address, the narrowest gate or driveway measurement, clear photos of the street approach, the proposed unloading point, the temporary storage area and the receiving contact ready. If the route is steep, narrow, shared, regional or otherwise uncertain, send those details before the order leaves the warehouse.
Contact Everpergo
Share:
Covered Patio Ideas for Homes With Limited Backyard Space
Louvered Roof System for Pool Areas: Shade, Ventilation and Splash-Zone Planning