

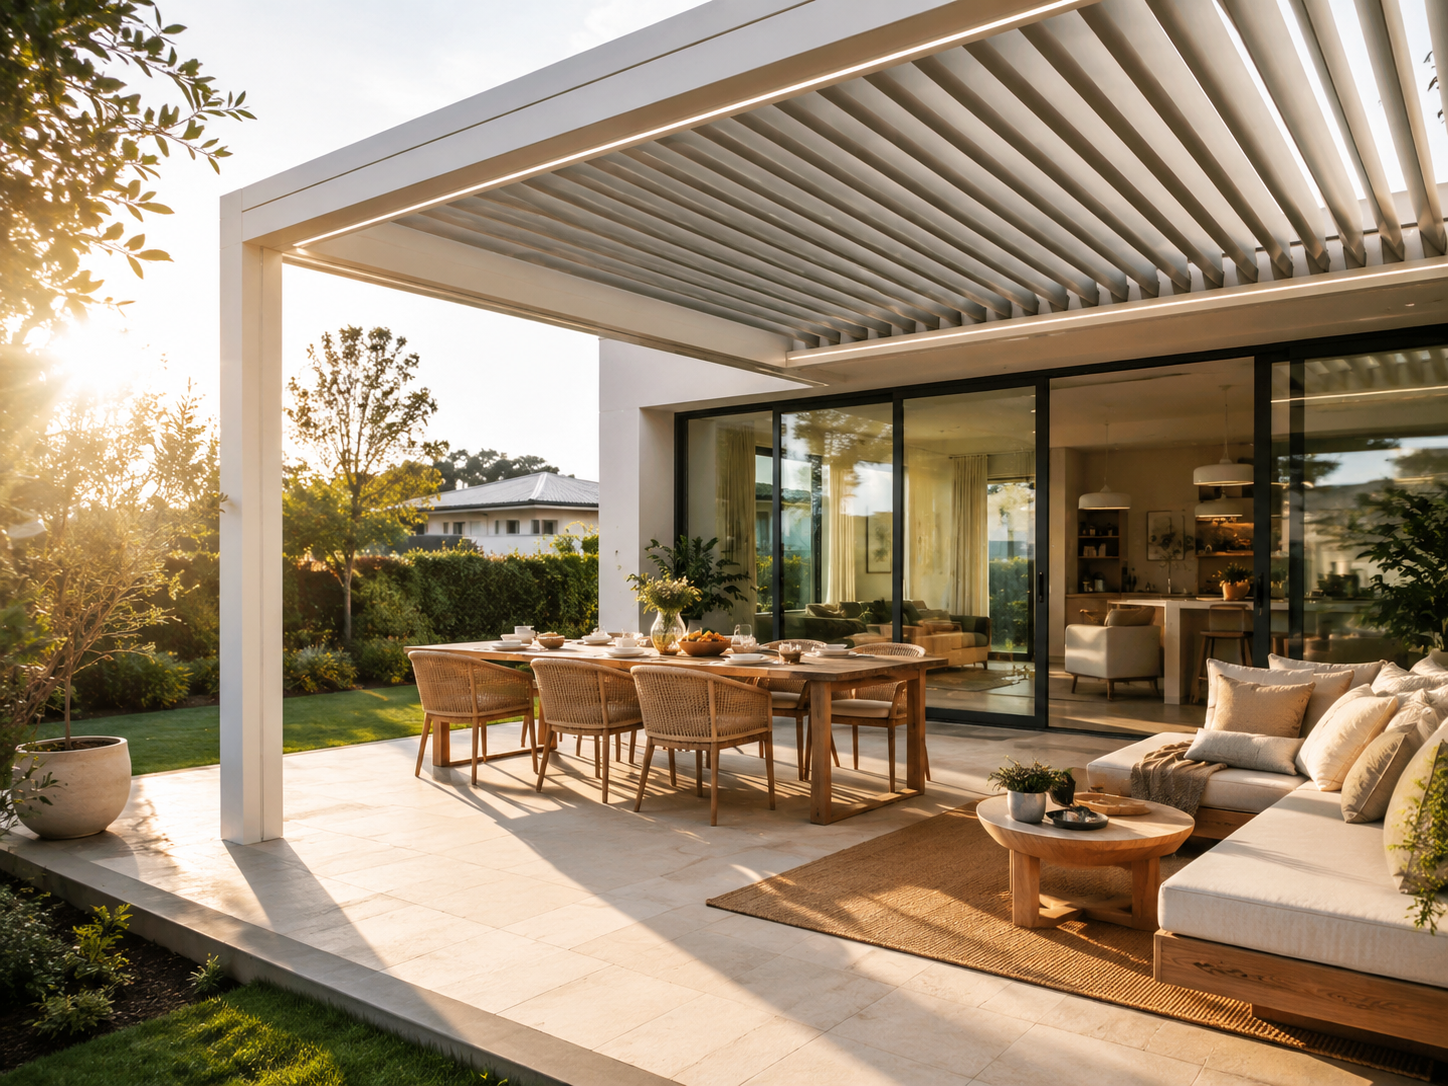
A north-facing patio can feel almost perfect at 8:00 in the morning, then noticeably hotter around lunch. That is why an adjustable pergola roof should not be planned around one simple goal such as blocking as much sunlight as possible. In this setting, the better result is selective: keep useful morning and winter light, reduce stronger summer exposure when it matters, and avoid making the living room or kitchen behind the patio unnecessarily dark.
Orientation is only the starting point. A clear northern outlook behaves differently from a courtyard partly screened by a neighbouring building, a mature tree, a deep eave or an upper-storey wall. Even two patios facing the same direction can receive very different light at 9:00 am.
The useful question is not simply, “How much shade does this patio need?” A better question is: which sunlight is worth keeping, when does heat become the problem, and what happens to the rooms immediately inside? Once those three points are clear, roof size and model choice become much easier to judge.
The idea in one glance
☀ Morning: keep useful light while the patio still feels mild.
◐ Midday: protect the table, lounge and paving that actually carry the heat load.
↗ Later: check whether the house or landscape is already providing shade before keeping the roof heavily closed.
| What you observe | What it means for the roof plan |
|---|---|
| The patio feels pleasant in the morning but too hot around lunch | Keep the earlier light; add stronger shade over the occupied zone before the hotter period. |
| The living room or kitchen becomes noticeably darker | Recheck roof depth and how long the louvres need to stay heavily closed. |
| Low light enters from a north-east or north-west edge | Test the roof first, then assess targeted side protection if the low-angle light remains. |
| Only empty paving gains extra cover | Reduce the footprint unless that area has a real circulation or furniture role. |
Understand the Sun Path Before Choosing Shade
A compass direction cannot show what happens over a breakfast table at 8:30 am. Before choosing a roof footprint, take several photographs from roughly the same position during one clear day. Include the patio floor, the house wall, nearby glazing and the place where dining or lounge furniture will actually sit.
The first useful check is early morning. Around 8:00 am, note where direct light first reaches the patio and how deep it travels. It may touch only the garden edge, stretch across half the paving or continue through a sliding door and onto the indoor floor.
Look again close to midday. By 12:00 or 1:00 pm, shadows are usually shorter and the roof area above the main seating position becomes more important. A patio that felt gentle earlier can now have a bright table surface, warmer paving and stronger light close to the house.
A third photograph around 3:00 or 4:00 pm completes the basic picture. On some sites, the house or nearby landscaping is already doing much of the shading by then. On others, direct sunlight remains over part of the patio for several more hours.
A useful three-photo record
8:00 am — Where does the first useful sunlight reach?
12:00–1:00 pm — Which table, chair or paving zone is becoming too exposed?
3:00–4:00 pm — Is roof shade still needed, or has the building started doing the work?

Season changes the picture again. Summer and winter sunlight follow different paths, so a shadow photographed in January should not be treated as the permanent pattern for the year. In winter, useful light may reach farther beneath the roof and deeper toward adjoining doors or windows. The Australian Government's YourHome shading guidance also treats adjustable shading as particularly useful where seasonal heating and cooling needs change.
Trees can make that difference even larger. Dense summer foliage might protect a breakfast corner at 9:00 am, while the same tree allows more light through during the cooler months. A neighbouring building can do the opposite by blocking lower winter sunlight while having much less effect on higher summer sun.
This is why north-facing should never be treated as automatically good or automatically difficult. It simply provides the starting direction. The roof plan should follow the light that actually reaches the site.
Morning Light vs Midday Heat
Morning sun and midday heat often get bundled into one “shade problem”. That can lead to the roof being closed more than the space actually needs. At 7:30 or 8:30 am, a strip of light across the table may feel pleasant; around lunch, the same position can feel completely different.
Consider a small breakfast setting about 1.5 metres outside a kitchen door. Early sunlight might warm the chair arms and brighten the paving without creating much glare. At that point, there is little benefit in treating the roof as though the hottest part of the day has already arrived.
By midday, the priorities may have shifted. Pale paving can reflect stronger light, the table may become uncomfortable to look across and darker surfaces can feel noticeably warmer. That is the period when stronger overhead shade starts doing useful work.
This distinction matters because a patio that feels good at 8:00 am and uncomfortable at 12:30 pm does not have an all-day sunlight problem. It has a specific heat and brightness window. The roof should respond to that window without removing the better part of the morning.
Keep the part of the morning that feels good
For a breakfast zone, a bright table can be an advantage. The same applies to a reading chair beside a glazed door or a small lounge setting used before work. During cooler hours, direct warmth on timber, stone or concrete can make the space feel more inviting rather than more exposed.
Indoor light may benefit at the same time. A kitchen bench sitting behind a north-facing opening can receive useful natural light while the roof is relatively open. If the patio becomes comfortable but the kitchen suddenly feels flat and dim, the shading strategy may be solving more than the actual outdoor problem.
Furniture position adds another clue. A two-seat table close to the house may already receive protection from the existing eave, while a larger dining table near the garden edge enters direct sunlight much earlier. Even a shift of 500 or 600 mm can change how that morning light feels.
The useful test is simple: move the chairs into their intended position and watch the light rather than judging an empty patio. That gives the roof a real target instead of an abstract rectangle of paving.
Around lunch, shade the activity rather than the whole slab
A patio is rarely one identical comfort zone. The metre closest to the house may act mainly as circulation space, while the centre holds the dining table and the outer edge contains lounge chairs. Those areas can receive very different amounts of sunlight at the same time.
Shade should follow that reality. There is little value in creating deep cover over an empty strip of paving if the chairs remain exposed. In the same way, extending a roof far beyond the seating area can remove useful daylight without improving the part of the patio that is regularly used.
One practical test takes only a few minutes. Put the real table and chairs in place around midday, then look at the shadow line across the seat backs, tabletop and walking path. The useful roof footprint becomes much easier to see.
The stronger plan is usually not maximum shade. It is enough shade in the right place at the right time, with the ability to reopen the roof when the harsh period passes.
How to Test Louvre Position on a North-Facing Patio
Louvre direction changes more than the brightness beneath the roof. It affects how direct sunlight passes through, how much sky remains visible and how open the upper part of the patio feels. The same movement can also change the path warm air takes as it rises.
There is no useful universal setting for every north-facing area. A sheltered courtyard behind a two-storey wall behaves differently from an open backyard with a clear northern aspect. Local latitude, trees and existing rooflines change the relationship again.
For that reason, an adjustable pergola roof is better judged by what happens below it than by a memorised blade angle. If direct light is interrupted across the dining table while the space still feels naturally bright, the setting is doing useful work. If the same position removes morning daylight from a kitchen for no clear benefit outdoors, it is probably doing too much. For a broader explanation of open, angled and more closed positions, use the adjustable pergola roof louvre angle guide.
Read the result, not a number
Too open: direct light is still landing on the table or main sitting position.
Useful balance: the occupied area is comfortable while the patio still feels bright and connected to the sky.
Too closed: useful morning or winter light disappears indoors without solving an active outdoor problem.
Watch the direction of the light, not only its strength
At 9:00 am, lower sunlight can create long shadows from posts, chair legs and nearby walls. As midday approaches, those shadows shorten and the roof above the occupied zone starts controlling a larger share of the direct exposure. This is why one roof position can feel pleasant in the morning and unnecessarily bright two hours later.
A simple white placemat can make the change easy to notice. Leave it on the dining table at 8:30 am and look again around 12:30 pm. If the midday surface becomes harshly bright while the morning surface felt comfortable, the need for stronger daytime shade is obvious without measuring an angle.
Sightlines matter too. In a compact courtyard, partly open louvres can preserve a view of the sky and stop the space feeling like an enclosed room. When fences or walls already surround several sides, that visual openness becomes more noticeable.
A larger backyard may feel different. With more open garden visible around the pergola, stronger overhead shade can feel less enclosing. The architecture around the roof changes the experience as much as the louvres themselves.
Shade and airflow need to be read together
A deeply shaded patio can still feel warm on a still day. Once direct sun has moved away from the table, keeping the roof heavily closed may offer less benefit than it did at lunch. Opening the louvres further can make the upper part of the space feel lighter and leave a clearer route for warm air to move upward.
The house itself may start doing some of the shading later in the day. If the wall throws shade over the dining area by 2:00 pm, the roof no longer has to solve exactly the same midday problem. A more open setting can then make sense without changing the furniture layout.
Furniture position affects the result again. A lounge pushed close to a glazed wall may experience more reflected brightness than a chair near the garden edge. A table directly beneath the centre of the roof gets another combination of light and rising warm air.
That is the practical advantage of adjustability. The roof does not have to choose between “open” and “closed” as permanent identities. It can respond to the part of the day that is actually happening.
Seasonal Settings for Summer and Winter
A roof routine that feels sensible in January can feel completely wrong in July. Summer usually places more weight on midday heat control, while winter makes useful sunlight more valuable. The important part is allowing that priority to move through the year.
That does not mean choosing one permanent summer position and one permanent winter position. A mild summer morning can still suit a more open roof. A very bright winter afternoon can still need some shade.
☀ Summer
Give more weight to shade over occupied surfaces during the stronger part of the day.
○ Winter
Keep useful sunlight available when it warms the patio or improves daylight through nearby glazing.
Summer: deal with the heat window, not the whole day
On a hot day, the useful observation happens before the surfaces have already become uncomfortable. If lunch normally happens between 12:00 and 2:00 pm, look at the patio shortly before that period. The roof can then create stronger cover over the table before direct exposure has heated the main seating zone.
Paving provides an easy visual cue. Pale stone or concrete may throw brightness back toward chair height even when the air still feels tolerable. Darker surfaces can absorb heat and stay warm later, which makes earlier shade over the active area more worthwhile.
Glass deserves attention at the same time. A sliding door immediately behind the dining table can receive less direct exposure as stronger midday shade develops. Still, the result should be checked from inside because deep shade across the entire facade may not be necessary when only the outer half of the patio is uncomfortable.
Winter: useful sunlight becomes part of the comfort plan
Winter often reverses the summer instinct. At 10:00 am on a clear, cool day, sunlight across a north-facing patio can warm chair arms, decking and paving that would otherwise stay cold. Removing that light automatically can make the area less inviting.
The indoor effect becomes more important at the same time. A living room behind a wide sliding door may rely on that brighter northern outlook through late morning. Keeping the roof more open while the light is useful can preserve both outdoor warmth and indoor daylight.
Follow the bright patch on the patio floor. At 9:30 am, it might sit near the outer edge. By 11:00 am, the sunlight may reach toward the doorway or just inside the room. If that movement brings welcome warmth without creating glare, there is a good reason to preserve it.
Winter still needs judgement rather than maximum openness. Direct light may eventually reach a television screen, dining position or kitchen surface where it becomes distracting. The roof can respond at that point rather than suppressing the better part of the morning from the start.
Spring and autumn rarely follow a neat routine
A 22°C spring morning may make an open roof feel ideal at 9:00 am, while stronger light around lunch calls for more shade. The following day can be cloudy enough to make yesterday's routine irrelevant. Shoulder seasons are where flexible control becomes especially useful.
Autumn works in much the same way. Morning light may already feel valuable, even though midday still carries enough heat to justify stronger cover. There is little value in choosing a calendar date when the pergola suddenly moves into “winter mode”.
Instead, watch four things: where direct sunlight lands, whether the table feels too bright, how much daylight remains indoors and whether the patio still feels open enough for the conditions. Those cues are easier to use than a theoretical seasonal setting.
Protect Indoor Light Near Living Rooms
The easiest planning mistake is making every observation from outside. A roof can create comfortable shade over a dining table while quietly changing the living room, kitchen or family area directly behind it. On the north-facing side of a home, that indoor effect deserves as much attention as the shade outside.
Imagine a roof extending about 3 metres from a broad sliding door. The outdoor table may sit comfortably beneath it, yet a sofa another 2 metres inside the glass could receive noticeably less daylight once the roof stays closed for long periods. That change matters even on days when the patio is barely used.
Summer can create the opposite issue. Strong light through the same glazing may increase glare or make the indoor edge less comfortable. Some roof shading can improve both areas at once, but only when the position is judged from both sides of the glass.
This is why the indoor photograph belongs in the same planning folder as the patio photographs. The pergola sits outside, but its visual effect does not stop at the door.
Stand inside before deciding what feels comfortable
Around 10:00 am, stand at the place that matters indoors: the kitchen bench, dining table or main living-room seat. Look toward the patio and notice how much sky remains visible through the opening. Then compare the view with a more open roof position.
That small check can be surprisingly revealing. A roof setting may look neat and shaded from the garden while making the interior feel flatter than expected. Slightly more openness may preserve enough outdoor comfort while giving the room back a stronger connection to daylight.
Take a photograph from that indoor position too. When several roof depths are being considered, the image makes it easier to remember which option starts to feel visually heavy from inside.
Check the roof from two viewpoints
From outside: Is the table or lounge protected during the period that actually feels too hot?
From inside: Has useful daylight disappeared from the kitchen or living room even though more shade is not needed outdoors?
Kitchen windows and living-room glazing need different checks
A narrow kitchen window above a worktop does not experience a pergola in the same way as a full-height sliding door. The smaller opening may see more of the underside of the roof and less open sky. Even when the patio feels bright, the worktop can lose a noticeable amount of natural light.
A large slider behaves differently. Its wider glazed area may continue admitting plenty of light, yet the room can still feel visually more enclosed if the roof extends deeply across the view. Light quantity and the sense of openness are related, but they are not exactly the same thing.
The indoor activity matters as well. Daylight across a kitchen work surface can be useful, while direct light across a television can be irritating. A dining area beside the same glass may sit somewhere between those two needs.
Naming the activity makes the planning note more useful. “Keep the kitchen bench bright until late morning” says much more than “protect indoor light”. Likewise, “reduce lunchtime glare near the sofa” gives the roof a specific job.
Roof depth is easy to underestimate
A compact roof beside a 3-metre-deep patio creates a different indoor view from a much deeper outdoor room. As the cover extends farther from the house, more of the sky can disappear behind it from certain indoor positions. The effect becomes stronger when the home already has a deep eave or an upper-storey projection.
That is why maximum coverage is not automatically better. Another metre of roof only adds value when it protects a part of the outdoor area that is genuinely used. If it shades an empty strip of paving while taking winter brightness away from a living room, that extra depth deserves another look.
A quick ground test helps. Mark the proposed roof edge with painter's tape or temporary objects, then stand inside and look toward it. Repeat the same test with the smaller footprint under consideration.
Sometimes the slightly smaller covered area still protects every chair and walkway that matters while leaving the house feeling noticeably lighter.
Model Selection by Outdoor Area Size
Orientation explains how the roof may be used, but it does not choose the model by itself. A compact breakfast courtyard and a larger entertaining area can both face north, yet their furniture plan, covered footprint and frequency of adjustment are completely different. Size needs to be read together with the way the patio is actually used.
The first useful measurement is not the total backyard. Measure the part that genuinely needs cover. Include the dining chairs when they are pulled back, the main walking route and enough room around the furniture for normal movement.
Then think about frequency. A roof adjusted once during a Saturday lunch has a different job from one above a space used for breakfast, midday dining and afternoon sitting throughout the week. That operating pattern helps separate a simple compact solution from a system where more frequent adjustment matters.
P120
Start here when the usable area is compact and manual roof adjustment fits the routine.
P180
Look here when a broader range of lengths or a choice between manual and motorised operation is more useful.
P180 Pro
Bring it into the shortlist when the covered outdoor room becomes larger and motorised operation better matches regular use.
P120 makes sense when the useful area stays compact
P120 is the natural starting point for a smaller, straightforward outdoor area. The current range includes 3×3 m and 3×4 m configurations with manual louvres, in freestanding or wall-mounted forms. That makes it relevant where a compact footprint and simple hands-on control suit the daily routine.
Picture a paved 3×3 m breakfast area outside a kitchen. A small table sits near the centre, four chairs fit comfortably and the space is mainly used in the morning with occasional weekend lunches. There is little reason to design that corner as though it were a much larger outdoor entertaining room.
Manual adjustment can also suit that rhythm. If the roof normally changes once when the sun becomes stronger around lunch, a simple control method can remain practical. The more important question is whether the footprint protects the occupied area without extending unnecessarily across nearby glazing.
 P120 aluminium pergola
Best matched to: a compact breakfast patio, smaller courtyard or straightforward covered area where manual louvre control fits the normal routine.
The key advantage here is not simply choosing a smaller model. It is keeping the roof close to the area that genuinely needs cover, which can help preserve more open garden and avoid unnecessary shade beside the house.
View P120P180 fits the broader everyday middle ground
P180 becomes more relevant when the patio stretches beyond a compact breakfast corner. The current range covers a broader selection of 3 m deep configurations and provides both manual and motorised louvre options. That gives it a useful middle position for patios used at several different times of day.
A typical situation might be a 3×6 m area outside the main family room. One end contains the dining table, while the other holds two lounge chairs and a clear path toward the garden. Morning sunlight may still be welcome near the house, yet the central area needs stronger overhead shade around lunch.
Use frequency starts influencing the control choice here. A roof used every day may move several times between breakfast and the afternoon. When that pattern is expected, motorised adjustment can be worth comparing rather than choosing control method only after the footprint has already been decided.
Manual operation can still make complete sense in another patio of the same size if adjustments are rare. Size alone does not automatically make one control method necessary. The routine matters just as much.
 P180 aluminium pergola
Best matched to: a broader everyday patio where dining, lounge or circulation zones share the roof and the preferred control method still needs to be compared.
Its wider size choice makes it particularly relevant when a patio needs more length without automatically increasing roof depth beside important living-room or kitchen glazing.
View P180P180 Pro enters the conversation when the outdoor room becomes larger
P180 Pro becomes more relevant as the planned covered area grows, particularly where the larger 3 m or 4 m deep configurations listed for the model better match the layout. The current product configuration should be confirmed before ordering; motorised operation is the main reason to bring it into the shortlist when frequent roof adjustment is expected.
The difference is easy to picture in a larger outdoor room. A broad space may carry an eight-seat dining table, a separate lounge setting and a walking route back to the garden. Those zones do not necessarily want the same amount of light at 9:00 am, 1:00 pm and later in the afternoon.
Regular adjustment becomes more meaningful in that situation. Keeping the roof open for useful winter light, moving toward stronger shade for lunch and reopening later can form part of the normal day rather than an occasional change.
Still, the larger footprint should earn its place. If part of the proposed roof sits above unused paving and takes valuable daylight away from the house, the smaller layout may remain the stronger choice even when the site physically has room for more.
Put the Furniture Plan on the Ground Before Choosing the Size
A tape measure and four temporary corner marks can reveal more than another round of online comparison. Mark the proposed roof outline on the paving, then place the real table and chairs inside it. Pull the dining chairs back as though someone were standing up.
Check the route from the house to the garden next. Around meal times, plates, drinks and chairs move through that path repeatedly. A layout that looks generous on paper can feel cramped once ordinary movement around the furniture is included.
Open nearby doors and screens fully. A post position that looks harmless on an empty slab may interfere with a hinged door, screen path or the natural route around the table. Those conflicts are easier to spot before a roof footprint is treated as final.
Then return indoors. Stand at the nearest kitchen bench or living-room seat and look toward the marked roof edge. If the larger footprint blocks much more sky while adding cover over an area that is barely used, there is a strong reason to reconsider the depth.
This is where model choice becomes practical rather than abstract. P120, P180 and P180 Pro should follow the useful footprint, adjustment routine and relationship with the house. The model name comes after those decisions, not before them.
North-Facing Patio Pergola FAQ
Will a pergola make a north-facing living room darker?
It can if the roof projects farther than the occupied patio needs or remains heavily closed when outdoor shade is no longer necessary. Check the proposed edge from the main indoor viewpoint and compare how much sky remains visible. A slightly smaller footprint may still cover the table and chairs while preserving more indoor daylight.
How deep should a pergola be beside north-facing glazing?
There is no useful depth based on orientation alone. Mark the proposed roof edge on the ground, place the real furniture inside it and check the view from the adjoining kitchen or living room. The right depth covers the occupied area and normal walking route without shading unused paving or removing more winter light than necessary.
Is a louvred roof enough for low north-east or north-west sun?
Not always. Very low light can enter beneath the roof edge even when the occupied area has good overhead shade. Test the louvre position first. If one exposed side still receives uncomfortable glare, targeted side protection may solve the remaining problem more precisely than keeping the whole roof closed.
What should be photographed before comparing pergola sizes?
Take the patio from a similar position in the morning, around midday and later in the afternoon. Include the table or lounge position, the house wall and nearby glazing. Add one photograph from the main indoor viewpoint so roof depth can be compared against visible sky and daylight inside.
When is P120 too small for a north-facing patio?
P120 is the first model to review when a compact 3×3 or 3×4 footprint covers the furniture and manual adjustment suits the routine. Move the comparison toward P180 when chairs, lounge seating and the main walking path need more length, or when a choice between manual and motorised operation is useful. Larger mixed-use outdoor rooms may justify comparing P180 Pro.
What to Record Before Comparing the Models
At this point, another hour spent reading general shade advice is less useful than ten minutes spent documenting the site. Use the three time-of-day photographs already described, add the view from the nearest kitchen or living-room position, and measure the area that genuinely needs cover rather than the overall backyard.
Write down how the space is normally used as well. A useful note can be very plain: “Breakfast around 8:00 am, lunch on weekends, keep the living room bright in winter, stronger shade needed over the table around midday.” That gives the model comparison a real job to solve.
Bring these five things to the comparison
✓ Morning, midday and afternoon sunlight photos
✓ One photo showing nearby living-room or kitchen glazing
✓ Usable patio width and depth
✓ Dining, lounge and walking-path positions
✓ A note describing how often roof adjustment is likely to happen
Those details make the initial model choice much sharper. A compact morning-use zone naturally points toward a different shortlist from a larger patio carrying dining, lounging and regular day-to-day use. The aim is not to move automatically toward the biggest model.
Structural fixing, drainage, electrical requirements for motorised configurations and any site-specific approval requirements still need to be confirmed for the actual property by the appropriate professionals where required. Sun-path planning answers how the patio should behave; it does not replace installation or structural assessment.
Compare the Models Against the Patio You Measured
For a morning-sun or north-facing area, the strongest plan is rarely “shade everything all day”. Keep useful early and winter light where it adds comfort. Give stronger summer shade to the occupied zone when heat becomes the problem, and check the living room or kitchen before increasing the roof depth.
Before narrowing P120, P180 or P180 Pro, collect the three time-of-day photographs, usable patio dimensions and one image from inside the adjoining room. Then mark the dining, lounge and walking zones on those measurements. That information turns the comparison into a real layout decision instead of a model-name decision.
With those details ready, the most useful next click is to compare an adjustable pergola roof across the Everpergo range. The likely model can then be checked in more detail against the actual footprint, control preference and site conditions.
Compare P120, P180 & P180 Pro
Share:
Patio Roof Planning for Homes With Existing Gutters and Downpipes
Bioclimatic Pergola Design: Creating Natural Airflow Without Losing Shade