

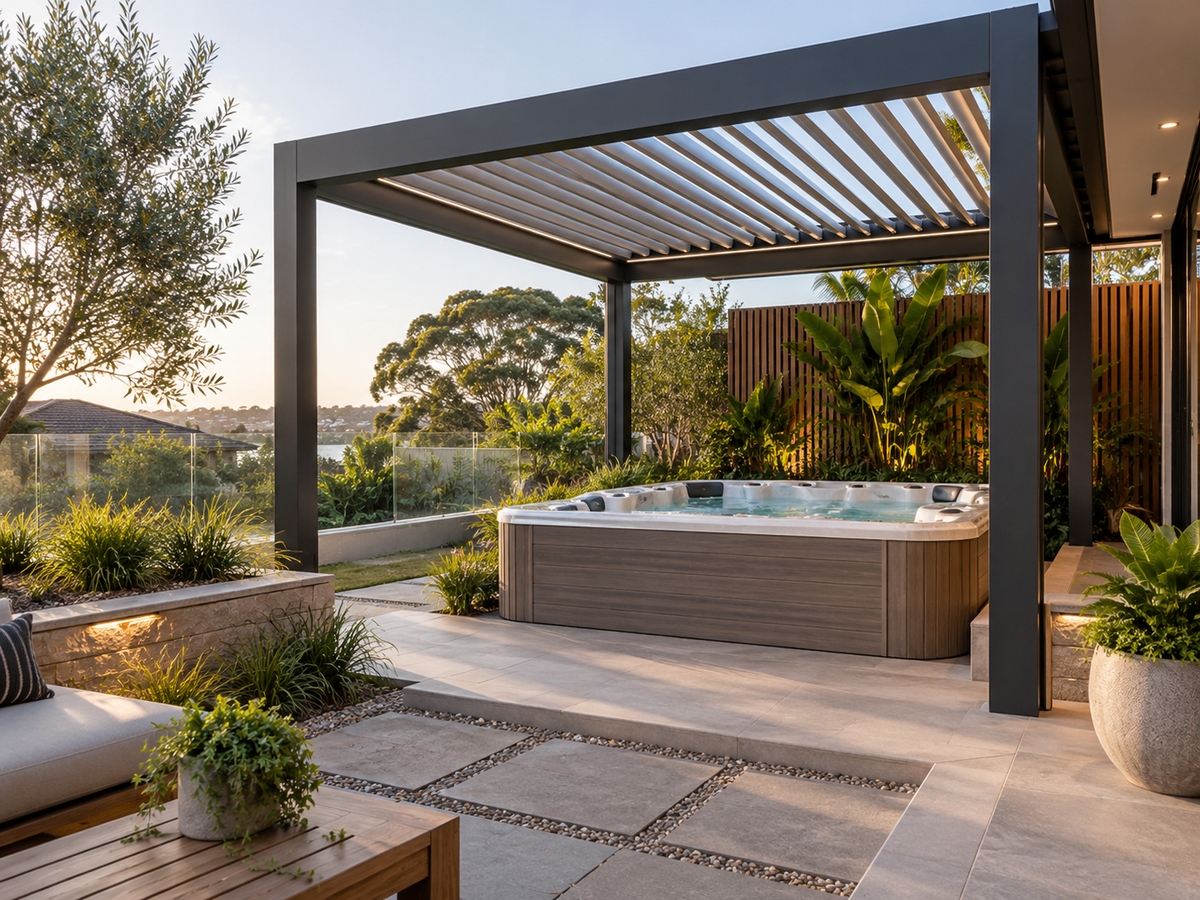
A pergola for a hot tub has to solve more than overhead cover. Warm, moist air needs a clear way out, privacy should be concentrated where it is actually needed, and the layout must leave enough room for people to enter the spa, open the cover and reach equipment for servicing. Those requirements can pull the design in different directions: adding more privacy can reduce openness, while chasing maximum roof coverage can put posts too close to an entry route or the open cover.
The practical starting point is the spa itself. Mark its footprint, the cover in its fully open position, the normal entry side and the equipment access zone before deciding where an outdoor pergola should sit. Only then does it make sense to compare a standard P180 layout with a made-to-fit option.
Quick planning rule
Do not draw the pergola around the closed spa. Draw it around the spa while it is being used: people moving around it, the cover fully open, warm air rising, and the service side still reachable. That working envelope is the area the pergola layout has to respect.
What must a pergola plan around a spa or hot tub solve?
A spa area is not simply a smaller version of a poolside entertaining zone. People stay close to warm water, often in the evening, and usually want more privacy than they would around a dining table or pool lounge. At the same time, the space still needs to behave like an outdoor area rather than becoming an unnecessarily enclosed box.
Three questions should lead the first layout sketch: where can moisture leave, where is privacy actually needed, and what has to move around the spa? If one of those questions is left until after the pergola footprint has been chosen, it can force awkward compromises later.
01 · Moisture
Give warm air somewhere to go
Look at the roof and the surrounding sides together. A visually open pergola can still sit in a sheltered pocket between a house, fence and dense planting.
02 · Privacy
Block the important sightline
A neighbouring window may matter more than three already-private garden edges. Treat the exposed direction instead of automatically closing every side.
03 · Movement
Plan beyond the tub footprint
Entry steps, the open cover, people standing beside the spa and equipment access all extend beyond the basic width and length of the tub.
A useful plan therefore shows two outlines: the spa itself and the larger working envelope around it. Posts, privacy elements and nearby furniture should be assessed against the second outline, not just the first.
Let warm, moist air move out of the space
A pergola roof changes the environment above a hot tub, but it does not remove the need to think about airflow. When the spa is in use, warm moist air rises from the water. The more sheltered the surrounding space becomes, the more important it is to understand where that air can continue moving.
Do not judge openness only by counting sides. A nominally open side may face a tall boundary fence a short distance away. Another may be partly occupied by the house. Dense vegetation, storage and future privacy treatments can also change the way the area behaves.
Read the space from the spa seat, not from the property plan
Sit or stand where the tub will actually be used and look around at seated height. Which side opens toward the garden? Which side is blocked by the house? Is there a narrow corridor between two solid boundaries? Where does the area feel noticeably more sheltered?
Those observations tell you more about the likely openness of the spa zone than a generic label such as “three-sided outdoor area”. They also reveal whether later privacy additions could remove one of the few useful open edges.
Treat roof adjustment as one part of the airflow plan
An adjustable louvre roof can change how open the overhead plane is during use. That flexibility can be useful when the spa shifts between daytime shade, cooler evening use and periods when a more open overhead condition is preferred. It should not, however, be treated as a substitute for sensible side openness.
If the house forms one full side and the boundary fence forms most of another, the remaining edges become more important. Adding dense screens, storage or tall planting along both of those edges may make the space substantially more enclosed even though the roof can still open.
Planning distinction: this is a layout check, not a ventilation-compliance calculation. Do not assume that a particular number of open sides, louvre position or gap automatically satisfies any requirement that may apply to the spa, building or site.
Add privacy without treating the space as a sealed room
Spa privacy is rarely equal in every direction. One boundary may already be hidden by planting, another may face a blank wall, while an upstairs window or side path creates the only genuinely uncomfortable sightline. The best privacy plan begins with those specific views rather than a desire to surround the tub on all sides.
This matters because privacy and airflow compete for some of the same space. A treatment that blocks a view can also interrupt an open edge. The goal is not maximum enclosure; it is enough visual separation for the spa to feel comfortable while preserving useful openness elsewhere.
Privacy can also be created through layout rather than by adding more enclosure. Rotating the spa, moving it slightly deeper into the garden, using existing landscaping as a visual buffer or placing the pergola so its posts frame rather than expose the seating position can all change sightlines.
Avoid assuming that a particular privacy screen or accessory is available for the chosen pergola unless it has been confirmed for the project. The planning principle works regardless: identify the exposed direction first, then decide how that view should be managed without unnecessarily closing the whole area.
Keep access, cover movement and servicing in the plan
Many spa layouts look generous while the cover is closed and nobody is standing beside the tub. They become much tighter during real use. A pergola post that appears well outside the spa footprint can still end up in the exact place a person needs to stand while lifting the cover or stepping into the water.
Before fixing the pergola footprint, draw the spa as a sequence of activities rather than a static object.
Water, services and the normal entry route
Put the usual approach route on the drawing first. Someone walking from the house may be carrying towels, drinks or a cover accessory, so a narrow squeeze between a pergola post and the side of the spa can become irritating quickly. Check the same route when other people are already sitting or standing beside the tub.
Also show known water, drainage, electrical and other service routes on the plan before choosing final post positions. Their actual requirements depend on the spa, site and relevant trades. The important design point is to avoid treating those service areas as spare space simply because they are not used as seating.
Show the hot-tub cover fully open
The open cover is one of the easiest details to miss. Depending on the spa and cover system, it can fold, lift or occupy a significant zone beside the tub. That movement may be more important to pergola post placement than the closed cover dimensions.
Draw or photograph the cover in its fully open state and mark where the operator stands. Check the distance to the proposed post line, privacy treatment, house wall and any nearby furniture. Do the same test from the direction in which the cover is normally closed again.
Common layout mistake
A plan can show generous clearance around the spa and still fail in practice because the cover opens directly into a pergola post. Always assess spa footprint + open-cover envelope + operator position together.
Protect the equipment servicing side
The equipment side should never become the leftover edge where a post, planter or privacy barrier is placed simply because nobody normally walks there. Pumps, controls, access panels and other components may need inspection or servicing, and technicians may require working room in front of them.
There is no useful universal clearance to invent here. Mark the equipment side and use the actual spa documentation to establish the required service area. Once that area is known, keep the pergola structure outside it rather than trying to make the access work after installation.
Check the layout against P180 or custom sizing
Once the moisture path, privacy direction, open cover and service zone are marked, the pergola choice becomes much easier to assess. The question is no longer “Is this pergola suitable for a spa?” It becomes “Can this footprint cover the part of the spa area that needs weather protection without interfering with the way the spa has to operate?”
Use that marked-up plan when you explore the P180 option . A freestanding pergola can be particularly useful to assess when the spa sits away from the house or when independent post positioning gives the layout more flexibility. The final configuration still has to be checked against the actual site and equipment requirements.


Send the working layout, not just the spa dimensions
A width-and-length measurement alone does not explain the important constraints. Two spas with similar outside dimensions can create different pergola layouts if their covers open in different directions, their service panels face opposite sides or one sits beside a tall fence.
Useful information to put on the spa plan
Once those constraints are visible, compare the proposed P180 frame line with the working envelope. Check whether a post crowds the entry step, sits in the cover movement path or reduces equipment access. Also look at how much of the surrounding paving genuinely needs roof coverage. Covering every spare centimetre is not useful if doing so pushes the structure into an active zone.
Use custom sizing when a specific conflict controls the footprint
A custom layout is most useful when it solves a defined site problem. The reason might be that a standard post position conflicts with the hot-tub cover, the roof needs to stop before a service zone, or the spa and surrounding access area create an unusual footprint.
In that situation, take the same marked-up drawing and discuss a made-to-fit layout . Custom sizing can address the pergola dimensions; it does not replace confirmation of spa clearances, electrical requirements, barriers, foundations or other requirements that apply to the equipment and site.
Before choosing the pergola footprint
Put the spa in “use mode” on the drawing
Bring the spa dimensions, cover opening direction and confirmed equipment-access requirements when assessing the P180 layout. If the standard footprint conflicts with one of those working zones, move the same plan into a custom-size discussion rather than forcing the spa to fit around the pergola.
Pergola for a spa or hot tub FAQs
Does a roof remove the need to plan ventilation? +
No. Warm moist air still needs a route away from the spa area. The useful level of openness depends on the surrounding house, fences, landscaping and other obstructions as well as the roof position. Any formal ventilation requirement should be confirmed for the actual project.
How can privacy affect airflow around a spa? +
Privacy treatments occupy the same edges that may otherwise help the area remain open. Identify the actual exposed sightline first, then treat that direction rather than surrounding the spa by default. Re-check openness after the privacy element is added to the plan.
Why should the hot-tub cover be shown open on the plan? +
Because the open cover can occupy space outside the basic tub footprint. Showing its full operating position makes it easier to identify conflicts with pergola posts, walls, privacy treatments and the place where a person needs to stand while opening or closing it.
Does adding a pergola replace spa barriers or equipment requirements? +
No. The pergola layout does not replace the spa manufacturer's installation and service requirements, electrical requirements, barriers or other site obligations that may apply. These should be confirmed with the relevant equipment supplier, installer and qualified professionals for the project.
Share:
Pergola Roof Condensation: Why Moisture Can Form and What Affects It
South-Facing Pergola: How to Keep Winter Light While Adding Weather Cover