

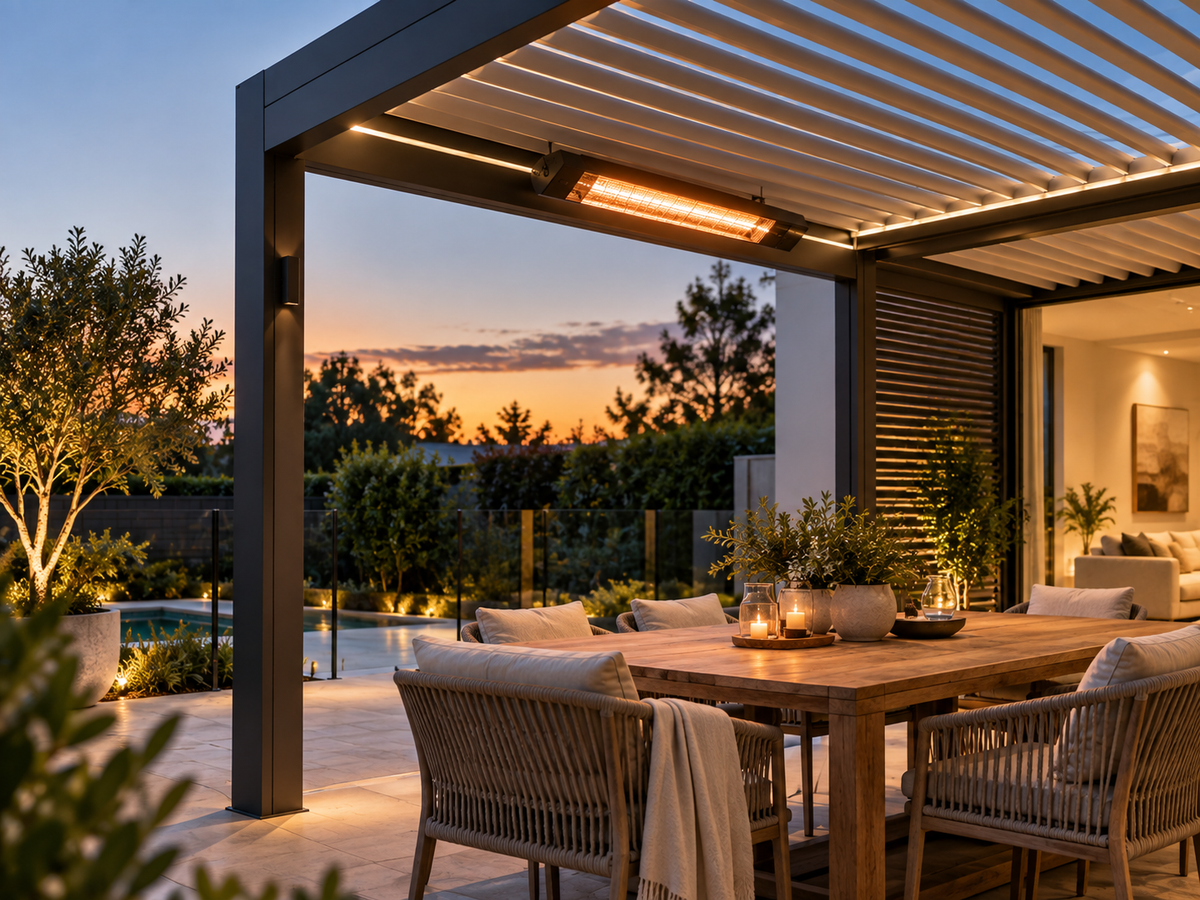
An outdoor heater under a louvre pergola can only be considered after the heater's own operating requirements are checked against the way the pergola will actually be used. An open roof does not automatically make a heater suitable, and a clearance taken from another appliance should never be reused. The practical planning job is to identify the exact heater, map its manufacturer-specified heat and clearance zone, consider furniture and walking routes, and then examine ventilation with the louvres and any side openings in their different positions.
This matters in Australian outdoor living areas because the same pergola can feel very different across one evening. A space that is open and breezy during the afternoon may become noticeably more sheltered once the louvres change position and people close blinds or screens for comfort. If the appliance instructions do not clearly cover that intended environment, suitability should be resolved with the relevant qualified professional before installation or use.
Quick answer
The pergola is only one part of the decision. Start with the exact heater manual, then compare its permitted setting and required clearances with the proposed location, furniture layout, roof position and surrounding openings. The most enclosed condition expected during normal heater use deserves particular attention. Final appliance suitability, fixing, ventilation and installation requirements should be confirmed for the specific appliance rather than assumed from the roof design.
Can a Heater Be Considered Beneath a Louvre Pergola?
Potentially, but the roof type alone cannot answer the question. What matters is whether the specific heater is permitted in the environment that the pergola creates when the appliance is actually operating.
A louvre roof pergola can shift from an open overhead condition to a much more sheltered one as the blades move. The sides may change as well. One edge might open directly to the garden, while another sits against the house. A boundary wall, outdoor blind or screen can further change the degree of enclosure.
This is why the phrase “it is outdoors” is not precise enough for heater planning. Two pergolas of a similar size can create different appliance environments because their surrounding walls, openings and everyday use are different.
Start with the appliance
Find the exact model instructions and check how the manufacturer describes permitted operating and installation environments.
Assess the real evening setup
Consider the roof position, walls, screens, furniture and openings as they are likely to be arranged when heating is actually wanted.
Resolve uncertainty first
If the appliance documentation does not clearly cover the proposed environment, obtain appliance-specific professional advice before proceeding.
A useful approach is to assess the setting that is most likely when the heater is needed. If people normally close the roof further on cool evenings or use side screens to reduce wind, that configuration is more relevant than the pergola photographed with every opening fully exposed.
Identify the Appliance and Its Permitted Setting
Do not begin by choosing the most convenient empty spot under the roof. Begin with the appliance. “Outdoor heater” covers very different installation and operating arrangements, so a meaningful site discussion needs an exact heater rather than a general category.
A freestanding unit changes the usable floor differently from an overhead or wall-mounted appliance. A fixed heater raises questions about the proposed fixing position, while a portable unit raises different questions about where it stands once chairs, people and circulation routes are taken into account. EVERPERGO also lists a radiant Outdoor Heater; check the exact unit and its installation instructions before treating any pergola position as suitable.
Record the brand, model, heater type and intended position. Keep the manufacturer instructions with the site notes. Do not copy a clearance from another appliance simply because the products look similar or use the same general heating technology.
Build a useful heater record before discussing location
The sequence matters. Selecting a visually convenient location first and then searching for a heater that can somehow fit the remaining gap often produces a compromised layout. Establish the appliance requirements first, then test whether the outdoor space can accommodate them without creating another problem.
Map the Heat Zone and Required Clearances
A heater should be treated as a spatial zone rather than simply as a physical object. Its body may occupy relatively little space, yet the required surrounding area can extend above, beside, behind or in front of the appliance according to the specific manufacturer's instructions.
Draw that required envelope onto the actual pergola layout. A marked photo can work well: show the heater position, relevant beam or roof line, furniture, nearby openings and the manufacturer's stated clearance boundaries on the same image. Mark the desired seating area separately: the manufacturer's clearance zone is a safety constraint, while the area people want warmed is a comfort target. The two should not be confused.
This often reveals conflicts that are difficult to notice when the heater and pergola are considered separately. A location may appear generous until a dining chair is pulled back, a blind is lowered or the louvres move into the position normally used on a cooler evening.

Check Above and Side Clearances Against the Exact Heater
Start with every direction identified by the appliance manufacturer. Do not assume the only relevant clearance is directly above the heater. Depending on the specific appliance, its instructions may address neighbouring surfaces in several directions.
Under a louvred roof, the overhead relationship deserves particular attention because the geometry is not fixed in one position. A proposed heater location should be considered with the louvres in the positions expected during heater use, not simply with the roof fully open.
A better site question
What can enter the required heater zone during normal use? Look beyond permanent beams. Chairs, blinds, curtains, plants, decorative objects and items moved into the space during winter can change what is actually near the appliance.
Test Furniture and People Routes, Not an Empty Patio
An empty outdoor area can make almost any heater position look spacious. Real use is different. Dining chairs move backwards. Lounge furniture may be rearranged. Someone carries food from the house. Guests stand near the edge of the table. Children or pets may repeatedly cross the same path.
Recreate a normal evening before accepting the proposed heater position. Put the main table or lounge furniture where it is normally used, pull the largest chair out, open nearby doors and walk the main route between the house and garden.
If a portable appliance is being considered, mark where its base will stand while operating rather than where it can be stored afterwards. The operating position is the one that needs to work with the occupied layout.
Looks acceptable on a plan
The heater fits between structural lines while furniture is represented as fixed rectangles and the pergola is shown in one roof position.
Works during real use
Appliance requirements remain accommodated while chairs move, people circulate and the roof or side conditions change during the evening.
The intended heated area also matters to comfort. Centring an appliance visually does not necessarily mean it will serve the occupied zone in the way expected. A dining table, outdoor lounge and open circulation area create different spatial priorities.
That does not justify guessing heater output, quantity or mounting height. It simply means the area people actually want warmed should be defined before appliance selection and location are finalised.
Plan Ventilation for Every Intended Roof and Side Condition
Ventilation planning should use the conditions in which the heater will actually operate, particularly the more enclosed arrangements likely on a cool evening. Assessing only the most open version of an outdoor pergola can create a misleading picture.
The same space may begin the afternoon with the roof open and several sides exposed to the garden. Later, the louvres may be repositioned for greater overhead shelter. Blinds or screens may also be used to reduce wind.
Those changes matter because “outdoor” is not a single fixed condition. The combination of roof position, permanent walls, boundaries and moveable side elements determines how open the immediate heater environment really is. For an electric radiant heater, check the permitted mounting environment, required clearances, outdoor electrical protection and fixing requirements. For a gas heater, combustion ventilation and the manufacturer's enclosure restrictions require separate attention.
Important planning boundary
An open louvre roof should not be treated as proof of adequate ventilation for a combustion appliance. The appliance instructions and the professional assessment required for the actual installation remain the reference points.
Review More Than One Evening Configuration
This may look like the most obviously ventilated arrangement, but it should not become the default assumption for every period of heater use.
Reconsider the overhead relationship and ventilation assumptions for the roof position likely to be used when conditions become cooler or less settled.
Review the arrangement people are likely to create for evening comfort rather than assuming moveable screens or nearby barriers have no effect on the heater environment.
Airflow can also affect perceived warmth even where combustion ventilation is not the issue. A strong cross-breeze may reduce how much warmth people feel in the intended seating area, while a more protected position may behave differently.
These comfort observations can help identify whether a proposed heater location is sensible, but they do not replace the appliance instructions. The more useful question is not simply “Is this pergola ventilated?” It is: “What will the roof and sides look like while this exact heater is operating, and does its documentation allow that setting?”
Confirm Suitability Before Installation or Use
Once the heater position has been mapped, bring the appliance information and pergola information together. This is where a qualified professional can assess a specific proposal rather than trying to answer a broad question such as “Can a heater go under a pergola?”
A useful review pack shows the exact heater, manufacturer instructions, proposed position, specified clearances, roof condition during intended use, side openings or screens, nearby furniture and the paths people normally use through the area.
What should go into the final review?
- Heater details: exact make, model, manufacturer instructions and intended operating arrangement.
- Position: a marked photo or drawing showing where the heater is intended to stand or be mounted.
- Changing conditions: intended louvre positions together with fixed or moveable side enclosures.
- Occupied layout: furniture positions and the routes people actually use through the outdoor area.
- Pergola information: the relevant roof and structural configuration for the proposed site.
For a P180-based project, review the P180 configuration alongside the heater documentation and site sketch. This gives the professional reviewing the proposal clear context about the pergola layout. It should not be interpreted as heater certification or blanket compatibility.

Sometimes the Layout Problem Should Be Solved Before the Heater Is Chosen
A proposed heater position can expose a broader spatial conflict. The preferred location may compete with a post, seating area, side screen or the only comfortable route between the house and garden. Trying to force the heater into whatever gap remains can make the outdoor space harder to use.
Separate the decisions. First establish what the heater requires. Then ask whether the pergola footprint and furniture layout can accommodate those requirements while preserving practical access and everyday comfort.
If a non-standard pergola dimension would materially improve the available arrangement, discuss non-standard dimensions as part of the spatial planning. Custom sizing may help resolve a layout conflict, but it should not be treated as evidence that a particular heater becomes suitable. The appliance still needs to meet its own requirements.
A practical sequence is: confirm the heater requirements → map the real operating condition → resolve layout conflicts → obtain the appropriate professional confirmation → finalise installation or use.
Keep the decision narrow
What This Planning Process Does — and Does Not — Confirm
This process can help determine whether the outdoor layout gives a particular heater a realistic location to be assessed. It can reveal clearance conflicts, changing roof and side conditions, difficult furniture relationships and situations where the overall layout needs reconsideration.
It does not certify an appliance, approve gas or electrical work, create a universal ventilation rule, confirm that a pergola beam is an acceptable fixing point or replace the installation requirements for the exact heater. Those questions remain appliance- and site-specific.
Outdoor Heater Under a Louvre Pergola FAQs
Does an open louvre roof automatically make a heater suitable? +
No. Opening the roof changes the surrounding condition, but it does not override the heater manufacturer's requirements or prove that the appliance is permitted in that environment. The exact heater and complete site arrangement still need to be assessed.
Can one clearance distance be used for every heater? +
No. Clearance requirements are appliance-specific and may also depend on the installation arrangement. Use the dimensions and conditions stated for the exact heater being considered rather than copying a figure from another product or previous project.
Can a heater be fixed to any pergola beam? +
That should not be assumed. The heater instructions, proposed fixing position and pergola structure all need to be reviewed for the specific installation. The final fixing and installation decision belongs with the relevant qualified professional.
What must be confirmed before the heater is installed or used? +
Confirm the exact appliance, permitted operating environment, manufacturer-specified clearances, proposed mounting or standing position, intended roof position, surrounding openings or screens, nearby furniture and circulation routes. Any unresolved installation, ventilation or compliance question should be settled before use.
Before the heater goes in
Confirm the Appliance First, Then Finalise the Outdoor Layout
Keep the heater manual, proposed operating position and pergola configuration together for the final assessment. If P180 suits the outdoor space, use its configuration as part of that discussion. If the site geometry itself creates the conflict, consider whether non-standard pergola dimensions need to be reviewed before installation decisions are made.
Share:
South-Facing Pergola: How to Keep Winter Light While Adding Weather Cover
Pergola Around an Outdoor TV: Glare, Viewing Angles and Weather Planning